FatAds Integration with CPV Lab | CPV One
FatAds (opens new window) is a self-serve ad network built for performance marketers. It specializes in push ads and pop ads, delivering high-quality traffic worldwide. FatAds is a strong choice for affiliate media buyers running direct response and lead generation campaigns.
This guide shows you how to connect FatAds as a traffic source, set up a MyLead offer for conversion tracking, and launch your first campaign, step by step.
How the Integration Works
CPV Lab | CPV One tracks your FatAds campaigns using a tracking code and sends conversions back to the ad network via S2S postback tracking (Server-to-Server). Here is the full flow:
You use the Campaign URL from CPV Lab as the Destination URL in FatAds
        ↓
Visitor clicks your FatAds ad
        ↓
CPV Lab records the click and assigns a unique SubID
        ↓
Visitor lands on your landing page (or goes direct to offer)
        ↓
Visitor converts
        ↓
The Affiliate Network fires the Postback URL and passes the conversion back to CPV Lab
        ↓
CPV Lab records the conversion and updates your campaign report
        ↓
CPV Lab can send information about conversion back to FatAds via Postback URL (S2S).
To complete this integration, you'll need:
- An active FatAds (opens new window) account
- An offer (we use MyLead offer as an example in this guide)
- A valid CPV Lab (opens new window) or CPV One (opens new window) license
Quick Summary
- FatAds Integration with CPV Lab | CPV One
- How the Integration Works
- Quick Summary
- Step 1 - Add FatAds as a Traffic Source
- Step 2 - Add your Affiliate Network as an Offer Source
- Step 3 - Set the Postback URL with your affiliate network
- Step 4 - Get Your Offer URL from MyLead
- Step 5 - Add the MyLead Offer in CPV Lab
- Step 6 - Create the Campaign in CPV Lab
- Step 7 - Add the Campaign URL to FatAds
- Verify the Integration
- Troubleshooting
Step 1 - Add FatAds as a Traffic Source
FatAds is pre-configured in the CPV Lab | CPV One Traffic Sources Catalog. You do not need to set it up manually.
- Go to Sources ➡️ Traffic Sources in your CPV Lab | CPV One dashboard.
- Click Import From Catalog.
- In the search field, start typing FatAds.
- Click on FatAds when it appears in the list.
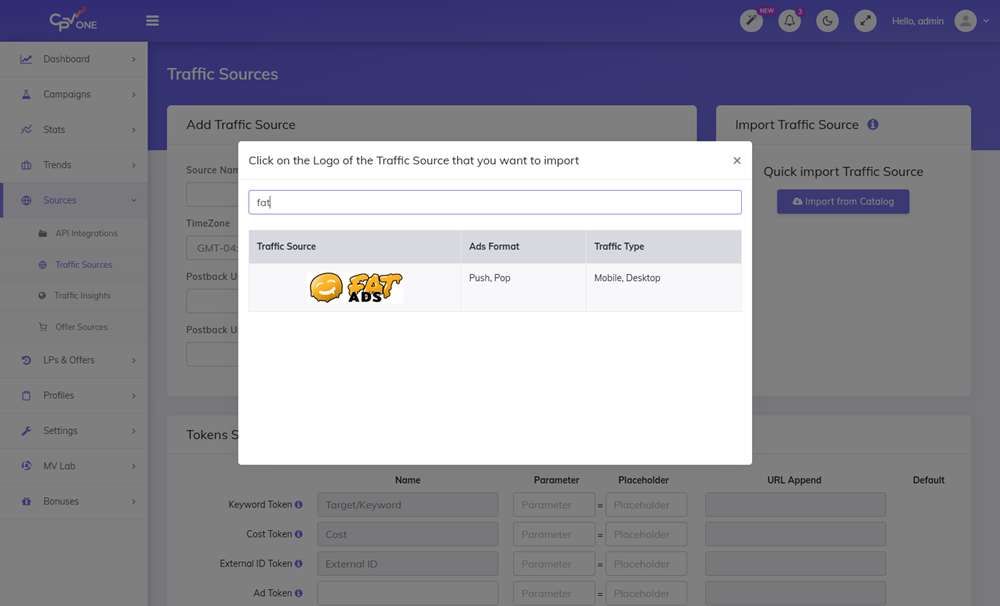
- Scroll down and click Save to confirm.
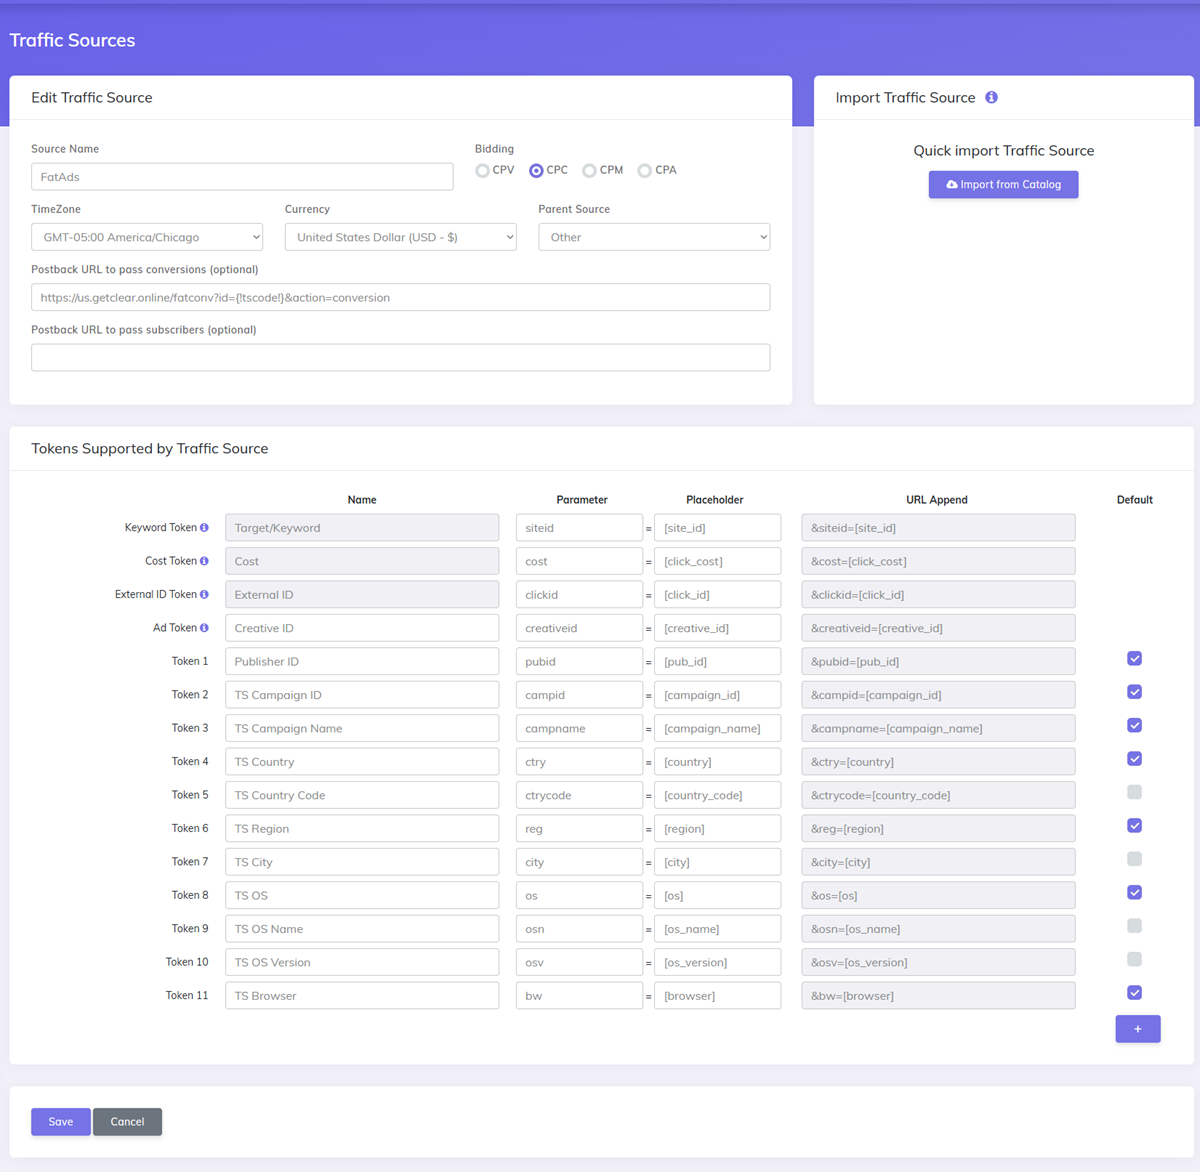
✅ FatAds is now added as a traffic source in your tracker. The tracking tokens (opens new window) and parameters are pre-configured — no manual setup needed.
Step 2 - Add your Affiliate Network as an Offer Source
Add the affiliate network you are working with as an Offer Source in CPV Lab | CPV One.
In this guide, we will use MyLead as an example. MyLead is also pre-configured in the CPV Lab | CPV One Offer Sources Catalog.
- Go to LPs & Offers ➡️ Offer Sources in your dashboard.
- Click Import From Catalog.
- Start typing MyLead in the search field.
- Click on MyLead when it appears.
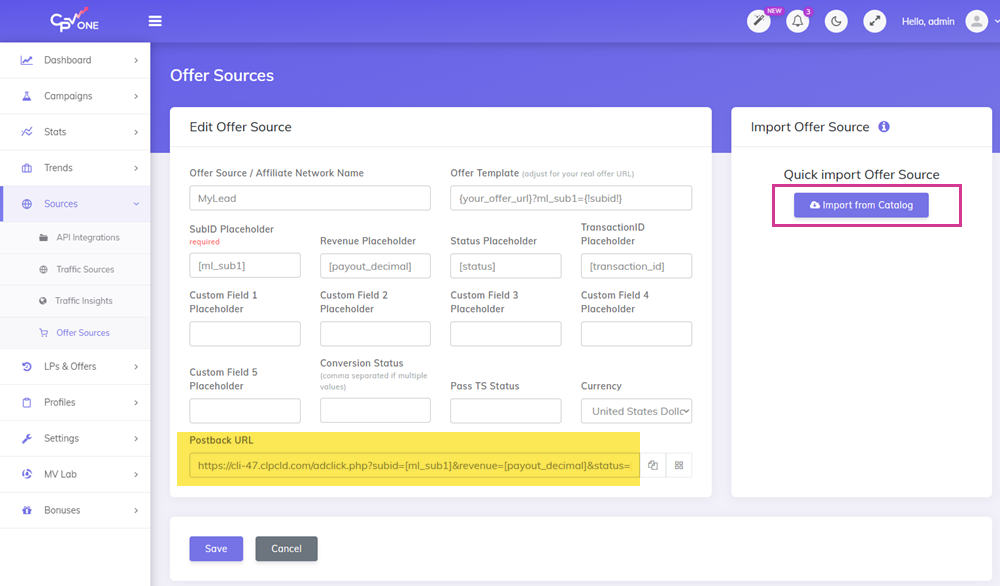
- On the MyLead Offer Source page, copy the Postback URL — you will need it in the next step.
- Click Save.
💡 Tip: Copy the Postback URL before moving on. You will paste it into your MyLead account in Step 3.
Step 3 - Set the Postback URL with your affiliate network
Now you need to add the CPV Lab Postback URL to your MyLead account. This tells MyLead to notify CPV Lab every time a conversion happens.
- Log in to your MyLead account.
- Go to Manage ➡️ Postback and API.
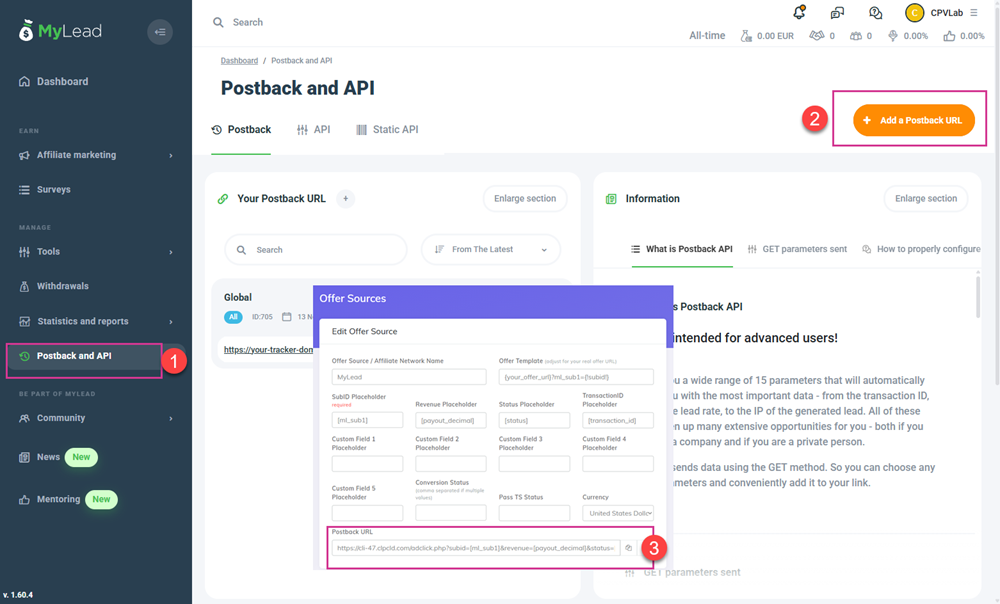
- Click the Add a Postback URL button.
- Paste the Postback URL you copied from CPV Lab in Step 2.
The URL should look like this:
https://your-tracker-domain/adclick.php?subid=[ml_sub1]&revenue=[payout_decimal]&status=[status]&txid=[transaction_id]
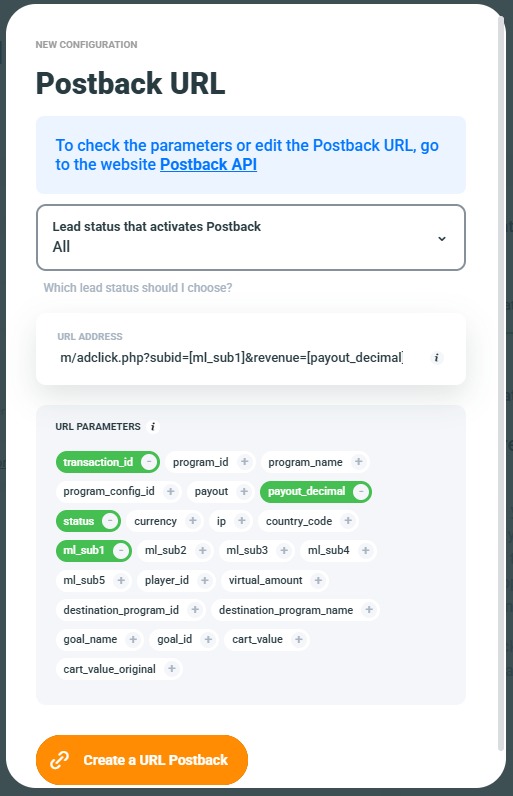
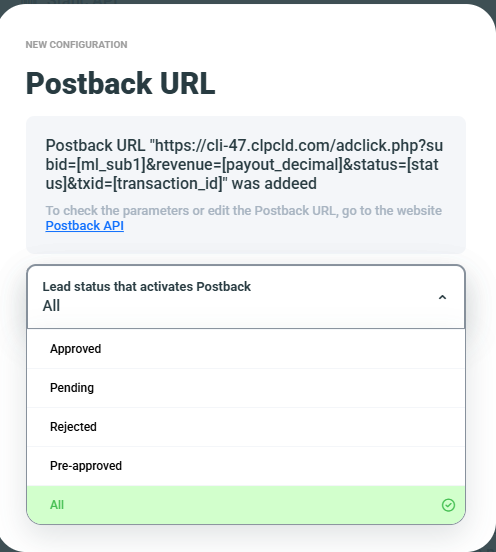
- Once pasted, MyLead will highlight the recognized parameters in green.
- Select which conversion statuses you want sent back to CPV Lab. Options include:
- Approved
- Pending
- Rejected
- Pre-approved
- ALL
💡 Which status should I track? For most campaigns, select Approved only. This keeps your conversion data clean. Use ALL only if you want to see every conversion status in your reports.
- Click Save to finish.
✅ MyLead will now fire the CPV Lab Postback URL automatically every time a visitor converts on your offer.
Step 4 - Get Your Offer URL from MyLead
Now select the offer you want to promote and get its tracking link.
- Log in to your MyLead account.
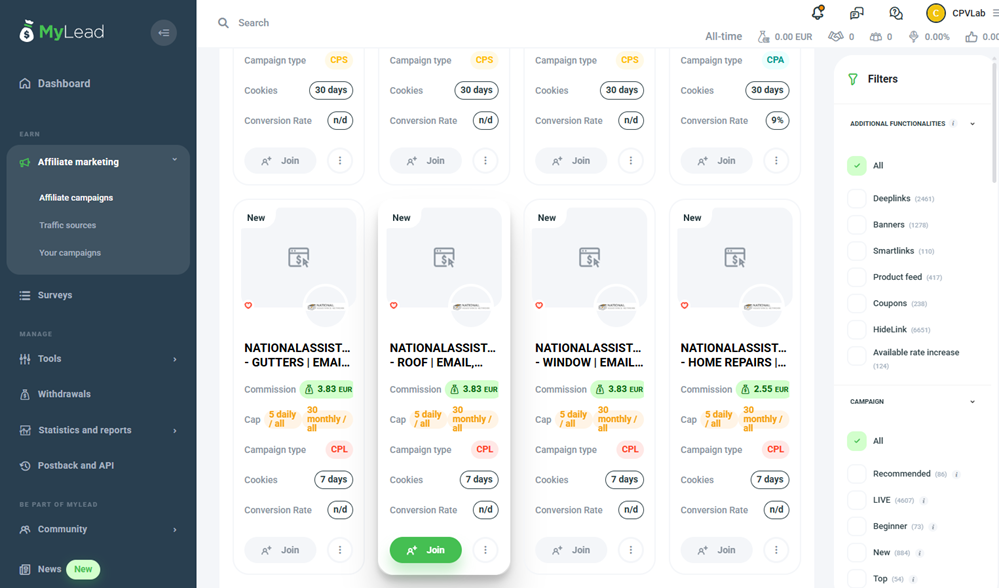
- Go to Affiliate Campaigns.
- Find the offer you want to promote and click Join.
⚠️ Note: Some offers require approval before you can promote them. If your offer is pending, you may need to wait before you can generate the tracking URL.
- Once approved, click on the offer and create a URL for it.
- Copy the Offer URL — you will use it in the next step.
💡 Tip: To join some offers in MyLead, you may need to add a traffic source to your MyLead account first. Go to Traffic Sources in your MyLead account and add FatAds as your traffic source.
Step 5 - Add the MyLead Offer in CPV Lab
Now add the MyLead offer to your CPV Lab | CPV One account.
Go to LPs & Offers ➡️ Offer Management.
Click Add New Offer.
Fill in the offer details:
- Offer Name — give it a clear name (e.g. MyLead - Offer Name - GEO)
- Offer Source — select MyLead
- Offer URL — paste the Offer URL you copied from MyLead
In the offer URL, make sure the
ml_sub1parameter is set to{!subid!}.
Your offer URL should look like this:
https://golead.pl/p/XXXX/adXF/SQLD?ml_sub1={!subid!}
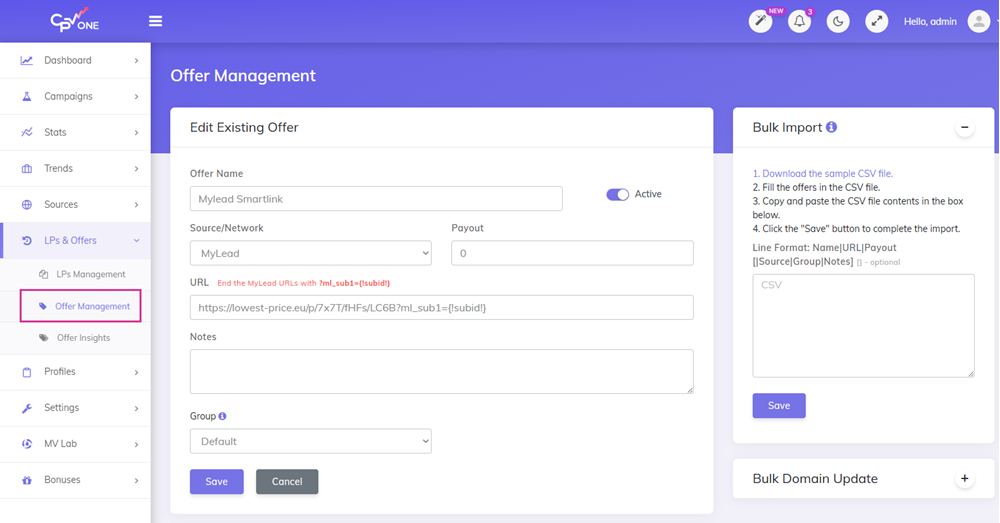
- Click Save.
⚠️ Critical: The
{!subid!}token in theml_sub1parameter is what connects each click in CPV Lab to the matching conversion in MyLead. Without it, conversions will not be tracked.
Step 6 - Create the Campaign in CPV Lab
With the traffic source and offer ready, create your tracking campaign.
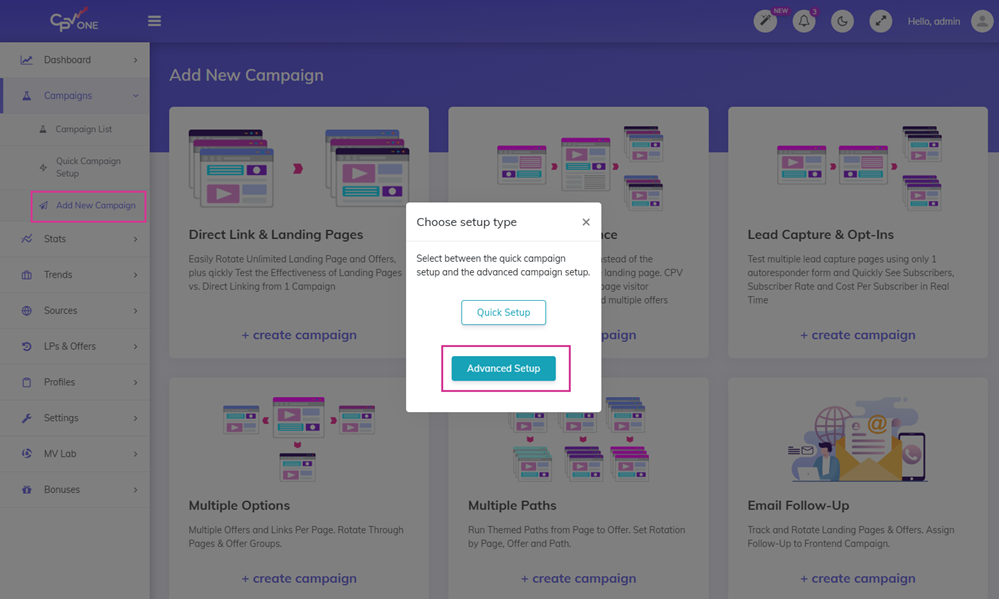
- Go to Campaigns ➡️ Add New Campaign.
- Select Direct Link & Landing Pages as the campaign type
- Click Advanced Setup.
TIP
You can choose any type of campaign, depending on your needs. In this example we will use Direct link and Landing Page campaign type
- Fill in the General Info section:
- Campaign Name — choose a clear name (e.g. FatAds - MyLead Offer - GEO)
- Redirect Type — select your preferred redirect method
- Custom domain — select the domain used for your landing page.
- Campaign Type — select the if you are using direct linking or a landing page

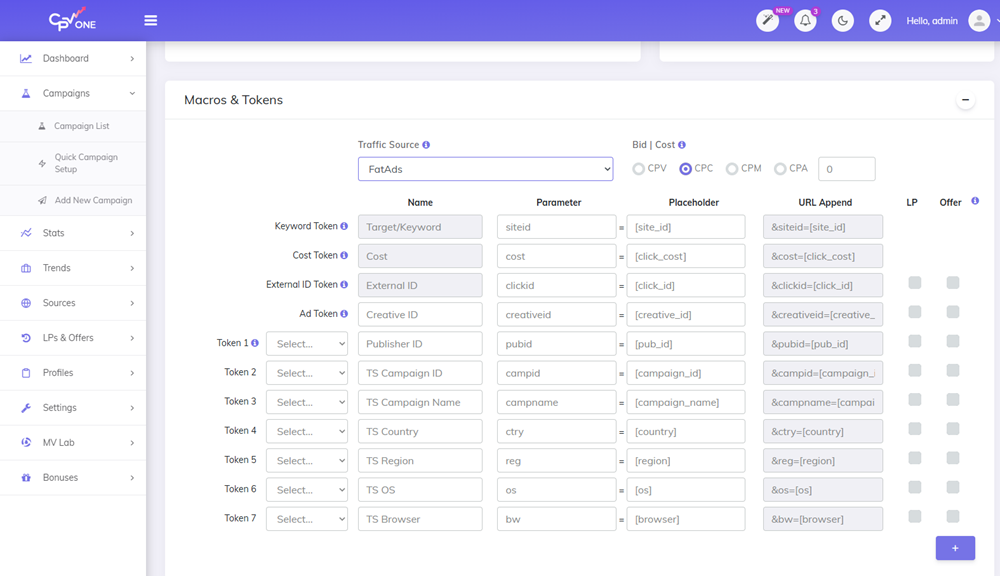
- In the Traffic Source section, select FatAds.
- Set your CPC or cost model based on your FatAds campaign bid.
- FatAds will send the cost value in the Cost parameter, so there is no need to setup an average bid value.
- In the Landing Pages & Offers section:
- Add your landing page if you are using one. Set the traffic share percentage.
- Add the MyLead offer you created in Step 5.
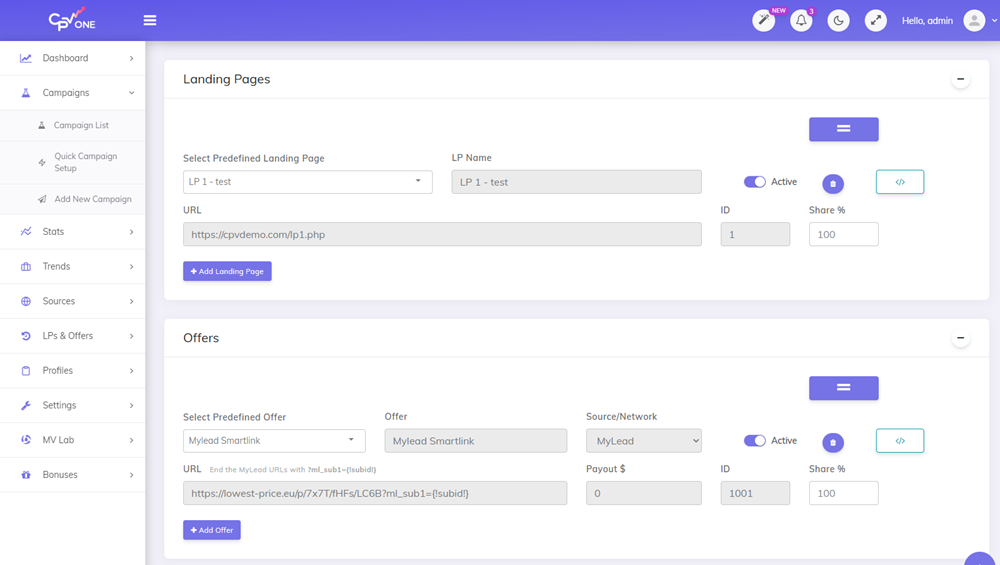
Click Save & AI Validation to finish creating the campaign.
Scroll down to find the Campaign URL. Copy it — you will use it in the next step.
![]()
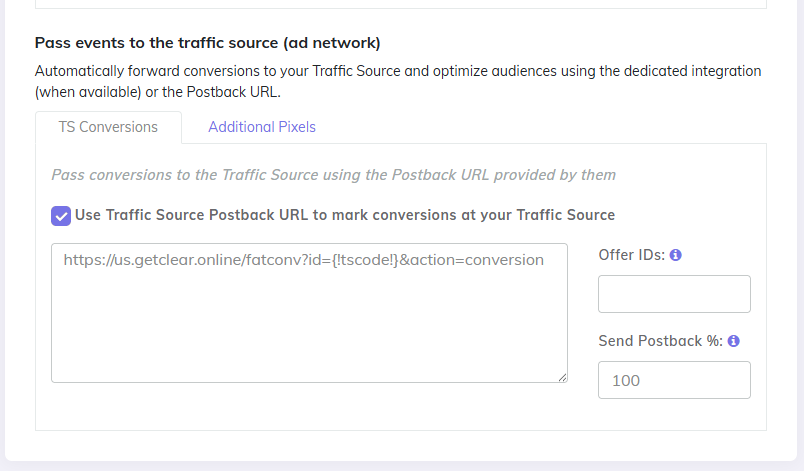
- The Postback URL is automatically selected to send conversions back to FatAds and optimize your audience
- You can select the percentage of conversions you want to send back
💡 Tip: Use the Campaign URL (Testing Link) to verify the tracking is working before you send live traffic. Open it in your browser and check that a click appears in your CPV Lab reports.
Step 7 - Add the Campaign URL to FatAds
The final step is to connect everything by placing the CPV Lab Campaign URL into your FatAds campaign.
- Log in to your FatAds account.
- Open your campaign in editing mode.
- Find the Destination URL field.
- Paste the Campaign URL you copied from CPV Lab.
- Fill in all the other fields (creatives, targeting, etc)
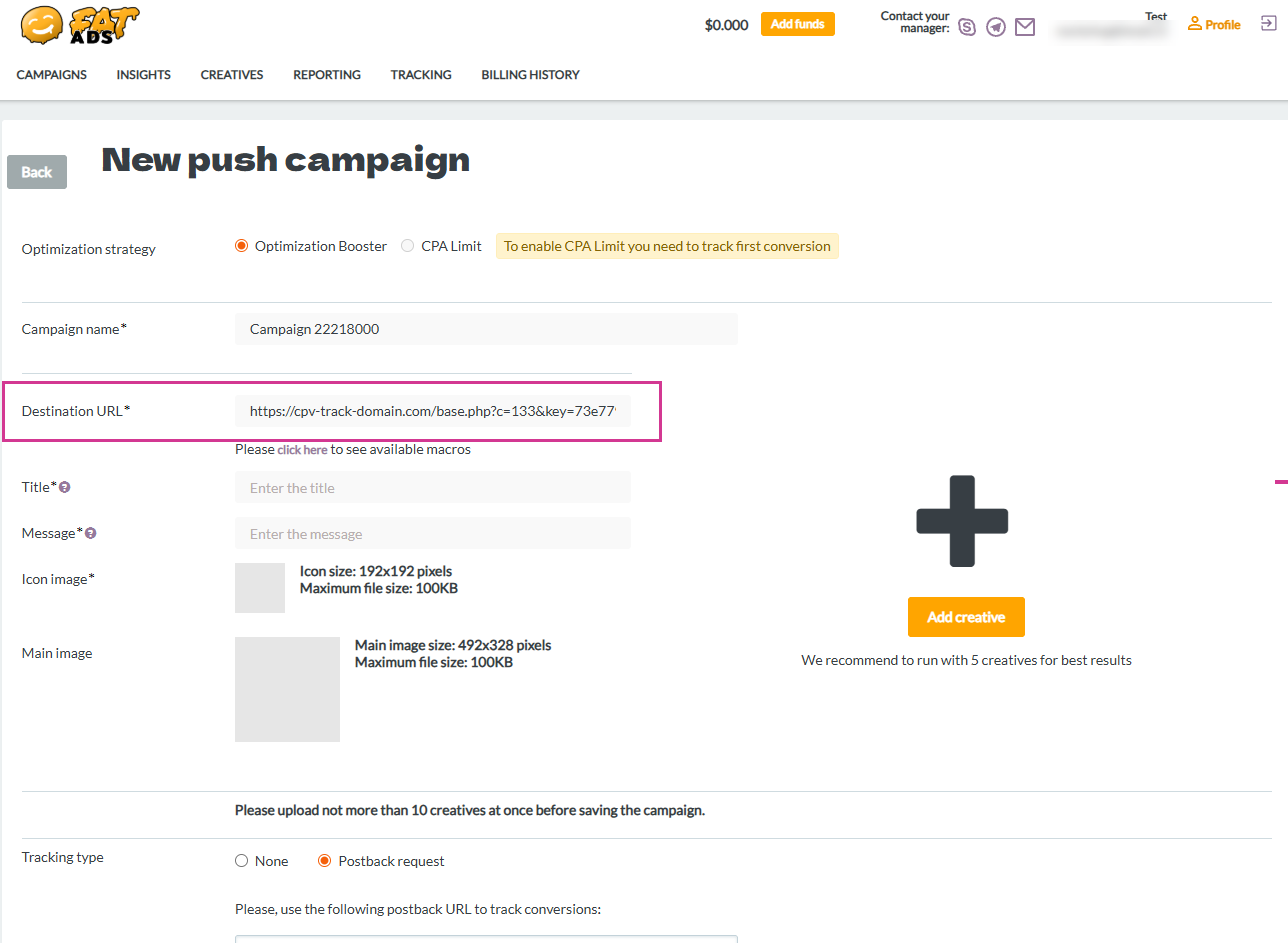
- Save your FatAds campaign.
✅ Your integration is complete. FatAds will now send traffic to your CPV Lab Campaign URL. CPV Lab will track every click, pass the unique SubID to MyLead, and record conversions when MyLead fires the postback. Also CPV Lab will send back to FatAds information about conversions Server to Server, via Postback URL.
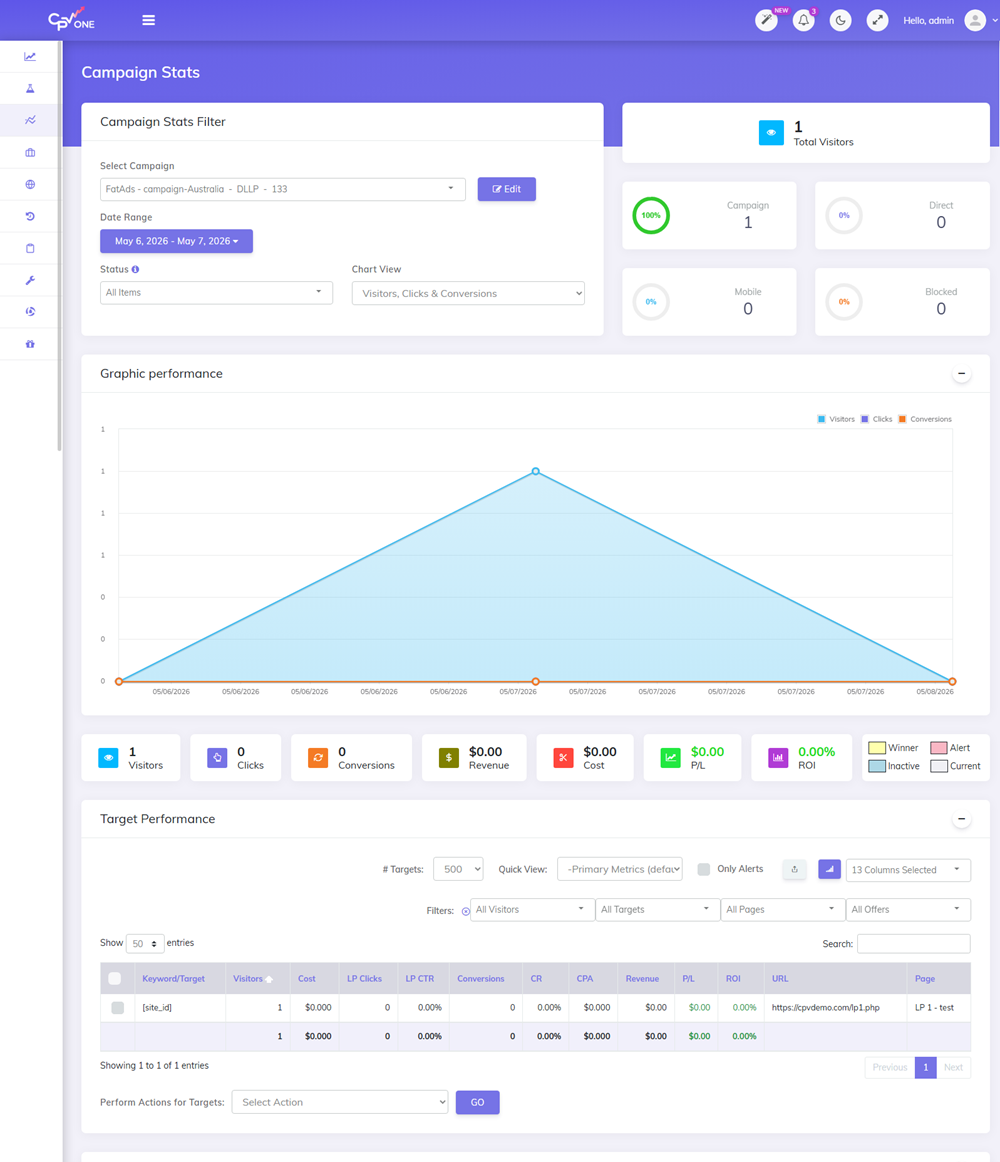
Verify the Integration
After launching, confirm that tracking is working correctly:
- Go to your CPV Lab campaign report.
- Check that clicks are appearing as traffic comes in.
- When a test or real conversion happens, check that the Conv column updates.
❌ Not seeing conversions? Check these common causes:
- The
ml_sub1={!subid!}token is missing from your MyLead offer URL (Step 5)- The Postback URL in MyLead is incorrect or not saved (Step 3)
- The CPV Lab Campaign URL is not correctly pasted in FatAds (Step 7)
- Your offer is still pending approval in MyLead (Step 4)
Troubleshooting
Clicks are not showing in CPV Lab.
- Check that the Campaign URL from CPV Lab | CPV One is correctly pasted in the FatAds Destination URL field.
- Make sure the campaign is active in both FatAds and CPV Lab.
Conversions are not showing in CPV Lab.
- Confirm the Postback URL is saved correctly in MyLead (Step 3).
- Check that
ml_sub1={!subid!}is in your offer URL (Step 5). - Make sure you selected the right conversion status in MyLead (e.g. Approved).
The SubID is not being passed back.
- Open your MyLead postback configuration and confirm the
[ml_sub1]token is present in the URL and highlighted green.
FatAds is not in the Traffic Source Catalog.
- Try searching for "Fat" or "FatAds" in the catalog search.
- If it still does not appear, contact CPV Lab support or add it manually.
You may also find useful: