
How to Upgrade CPV Lab to Version 14 (Upgrade Wizard Guide)
This guide shows you how to upgrade your self-hosted CPV Lab (opens new window) installation to version 14 using the one-page Upgrade Wizard.
In version 14 the Upgrade Wizard does the work for you. It downloads the upgrade package, updates the database and replaces the files automatically. You only upload the small Upgrade Wizard package once. There are no manual database imports and no large file uploads.
At a glance
- Time needed: about 15 minutes
- Applies to: CPV Lab installations prior to version 14.0
- When to use this page: One time usage. After version 14, the upgrade is done with one click directly from your tracker dashboard.
- You need: FTP or cPanel File Manager access, access to your database (for the backup), and your User Area (opens new window) login
- Steps in the wizard: 2 (check server requirements, then run the automatic upgrade)
On this page
Upgrade Overview
The whole process has 3 parts:
- Prepare your server: check the requirements, back up your data and upload the Upgrade Wizard package.
- Wizard Step 1 - Check Server Requirements: the wizard confirms that your server is ready.
- Wizard Step 2 - Automatic Upgrade: the wizard downloads the upgrade package and updates the database and files.
If the automatic upgrade fails, you can finish with the manual upgrade steps.
Server Requirements for CPV Lab 14
Before you start, make sure your server meets these requirements. If you are not sure, your web host can confirm them for you.
| Requirement | Minimum value |
|---|---|
| Server | Linux server, VPS or dedicated hosting (recommended) |
| PHP version | PHP 8.1 - 8.4 (PHP 8.4 recommended) |
| Database | MySQL 5.6.3 or above / MariaDB 10.0.12 or above |
| ionCube Loader | version 13.0 or newer |
| Disk space | at least 500 MB free |
| PHP memory | 256 MB (memory_limit in php.ini) |
| External requests | enabled (the wizard downloads the upgrade package from our servers) |
Required PHP extensions:
- BCMath
- iconv
- json
- mbstring
- mysqli
- session
- SimpleXML
- xmlreader
- zip
Before You Upgrade
1. Back up your database and files
Make a backup first
Always back up your CPV Lab database and files before you upgrade, so you can restore them if something goes wrong.
- Database: export it from phpMyAdmin or another database tool on your server. See Backing Up Your CPV Lab Database.
- Files: copy your CPV Lab folder to your computer with an FTP client such as FileZilla (opens new window).
2. Download the Upgrade Wizard package
- Log in to the User Area (opens new window) with the credentials you received by email when you purchased CPV Lab (opens new window).
- Download the Upgrade Wizard package for your PHP version.
- Unzip the package on your computer.
3. Check your PHP and ionCube Loader versions
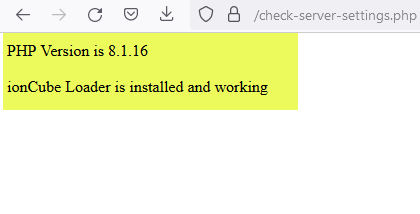
- Upload only the
check-server-settings.phpfile from the package to your CPV Lab folder on the server. Use FileZilla (opens new window), the cPanel File Manager or any other FTP tool. - Open the page in your browser:
https://<your_CPV_Lab_Domain>/check-server-settings.php - Check the result:
- PHP version 8.1 - 8.4 and the message
ionCube Loader is installed and workingare displayed: your server is ready, so continue with the next step. - A completely blank page: your ionCube Loader needs to be upgraded. Ask your web host to upgrade it to version 13.0 or newer.
- PHP version 8.1 - 8.4 and the message
4. Upload the Upgrade Wizard files
Upload all files and folders from the package to your CPV Lab folder on the server, overwriting the existing files. Use the same FTP tool or the cPanel File Manager.
5. Open the Upgrade Wizard
Open the Upgrade Wizard in your browser:
https://<your_CPV_Lab_Domain>/upgrade-wizard.php
Step 1. Check Server Requirements
The Step 1 section lists every server requirement and its status:
- GREEN: the requirement is met.
- RED: the requirement is missing. The message explains how to fix it.
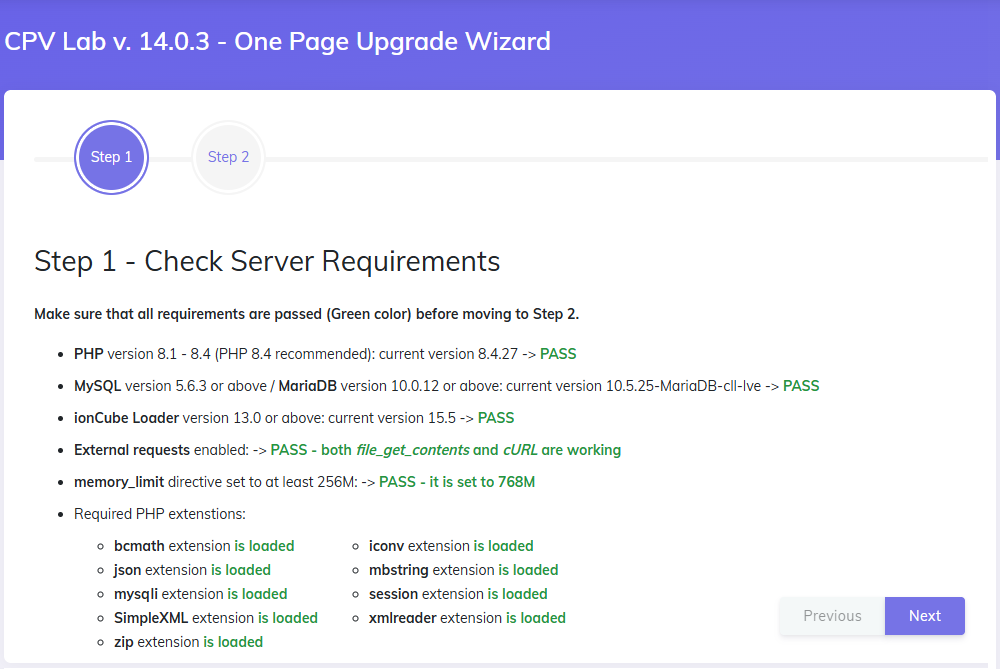
Fix every RED item before you continue. When all items are GREEN, go to Step 2.
Step 2. Run the Automatic Upgrade
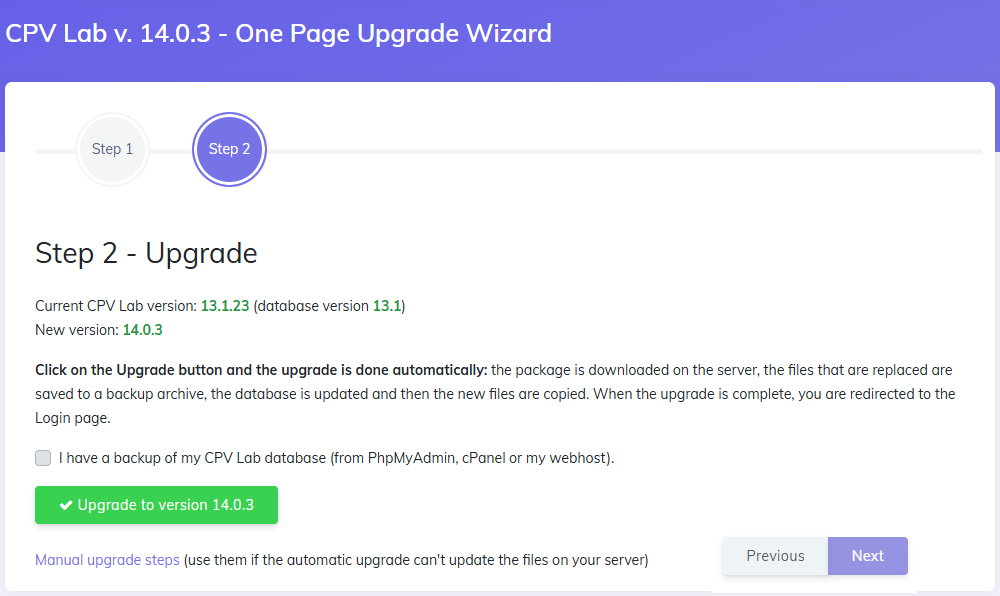
- Confirm that you have made a backup of your database.
- Click the green Upgrade button.
- Wait for the upgrade to finish. Do not close or refresh the page while it runs.
The wizard then does the following automatically:
- downloads the complete upgrade package in the background
- checks the required file permissions
- backs up your existing files
- updates the database to the latest version
- copies the new files to your server
You can follow the progress on the page:
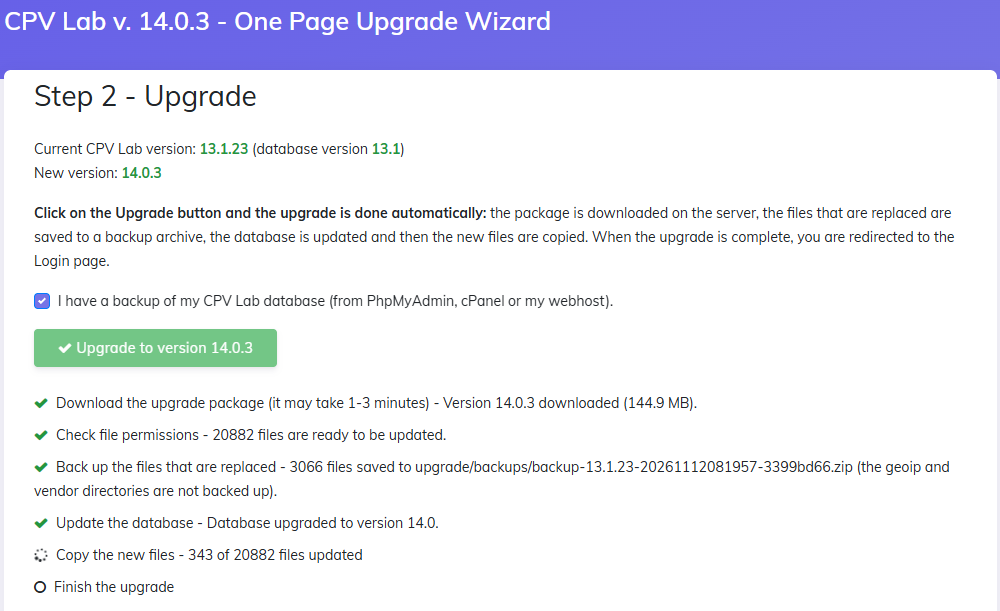
When the upgrade is complete, you are redirected to the login page. Log in with your existing CPV Lab username and password.
Manual Upgrade (Only if the Automatic Upgrade Fails)
Use the manual upgrade only if the automatic upgrade stops with an error message.
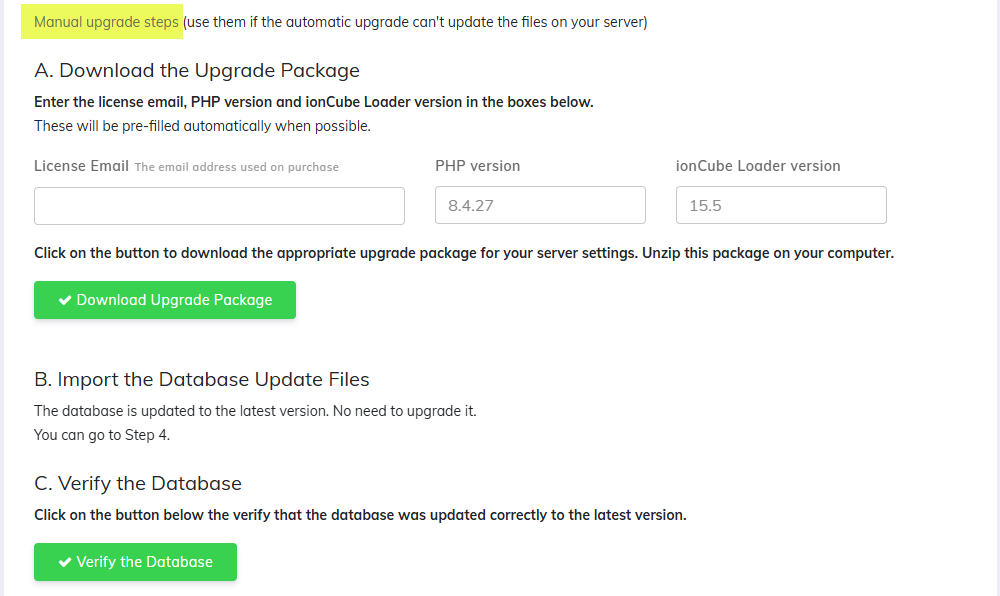
Click the Manual upgrade steps link in Step 2 and follow the 4 steps shown there:
- Download the Upgrade Package
- Import the Database Update Files listed in this section
- Verify the Database
- Upload the New Files
When you finish these steps, you are redirected to the login page of your CPV Lab instance.
Troubleshooting Upgrade Errors
Error messages in the Upgrade Wizard
All errors and warnings are shown in RED. Most of them tell you how to fix the problem:

Fix all warnings in the current step before you move to the next one.
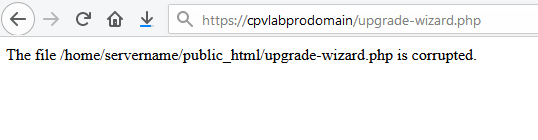
Blank page or "corrupted file" message
If the Upgrade Wizard page is blank or shows a message about corrupted files, your ionCube Loader is too old.
ionCube Loader 13.0 or newer is required
CPV Lab 14 needs ionCube Loader version 13.0 or newer. Ask your web host to upgrade the ionCube Loader on your server.
Upgrade Wizard shows no text or images
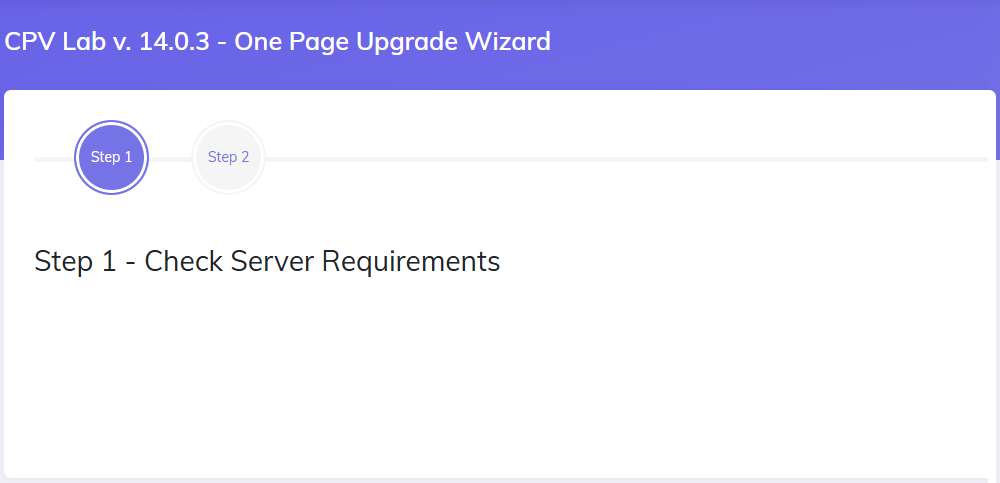
If the Upgrade Wizard page loads without text and images, check that these 2 PHP extensions are enabled on your server:
- mbstring
- cURL
Your web host can enable them for you.
Frequently Asked Questions
How long does the CPV Lab 14 upgrade take?
About 15 minutes, including the backup and the server checks.
Will I lose my campaigns and stats when I upgrade?
No. The upgrade updates the database structure and keeps your data, and the wizard also backs up your existing files. We still recommend making your own backup of the database and files before you start.
Which PHP version do I need for CPV Lab 14?
PHP 8.1 to 8.4. We recommend PHP 8.4. You also need ionCube Loader 13.0 or newer.
Where do I download the Upgrade Wizard package?
From the User Area (opens new window). Log in with the credentials you received by email when you purchased CPV Lab, then download the package for your PHP version.
Do I need to log in again after the upgrade?
Yes. When the upgrade finishes you are redirected to the login page. Use your existing CPV Lab username and password.
What's new in CPV Lab 14?
See the CPV Lab version 14 updates page.