
Easily tracking and optimizing your email campaigns with CPV Lab only takes a few minutes to get up and running.
In this tutorial we’re going to walk you through how to set up a Lead capture & Opt-in campaign using CPV Lab.
| Table Of Contents: | Section: |
| ➀ Step 1: Create Campaign | ▶ Go To |
| ➁ Step : Macros & Tokens | ▶ Go To |
| ➂ Step 3: Add Links & Pixels | ▶ Go To |
| Video: Step By Step Tutorial | ▶ Go To |
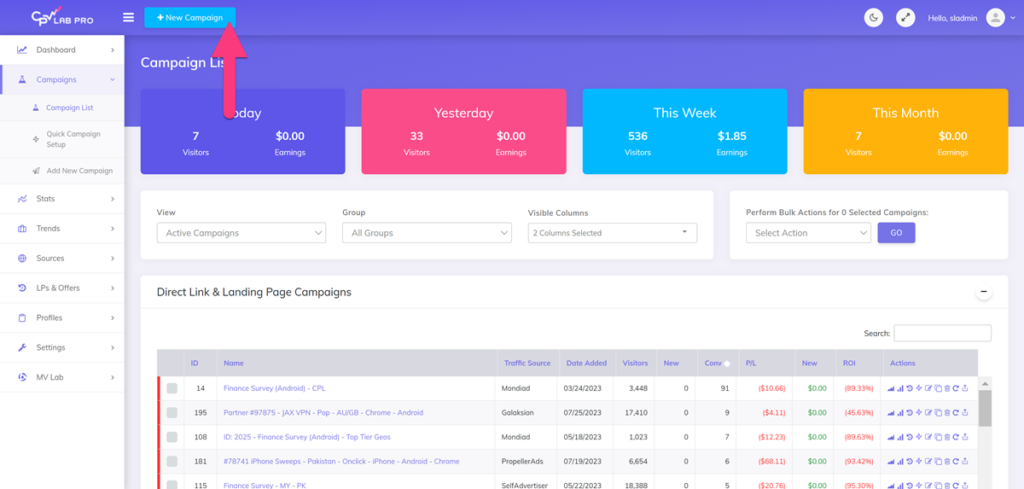
Create a campaign by clicking the “New Campaign” Button.
➀ Step 1: Create a Campaign
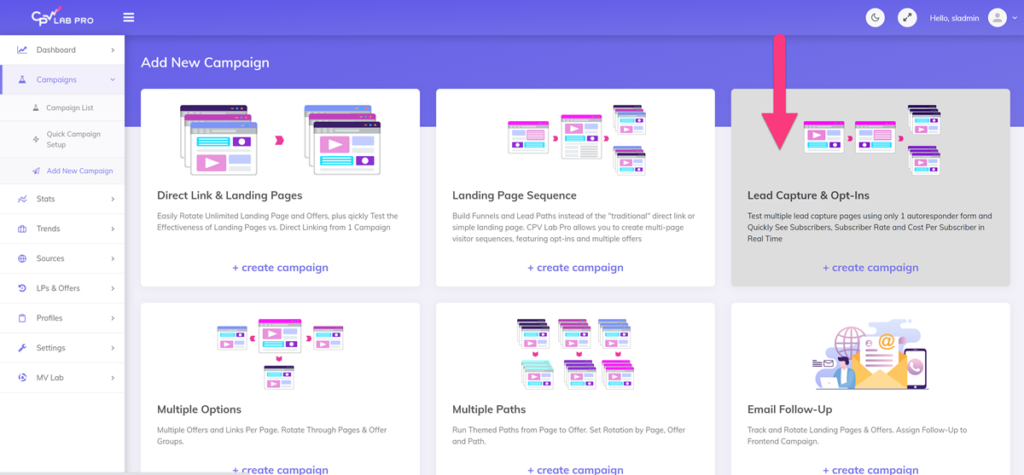
There are 6 campaign types predefined in CPV Lab, to cover all kind of funnels:
- Direct Link & Landing Page – used for direct linking or when you have landing pages
- Landing page sequence – used for complex Funnels and Lead Paths instead of the “traditional” direct link or simple landing page.
- Lead Capture & Opt ins – used to test multiple lead capture pages using only 1 autoresponder form.
- Multiple path campaign
- Multiple Option campaign
- Email Follow-up – used to track emails
Click the box (campaign type) that says “Lead Capture & Opt-Ins“.
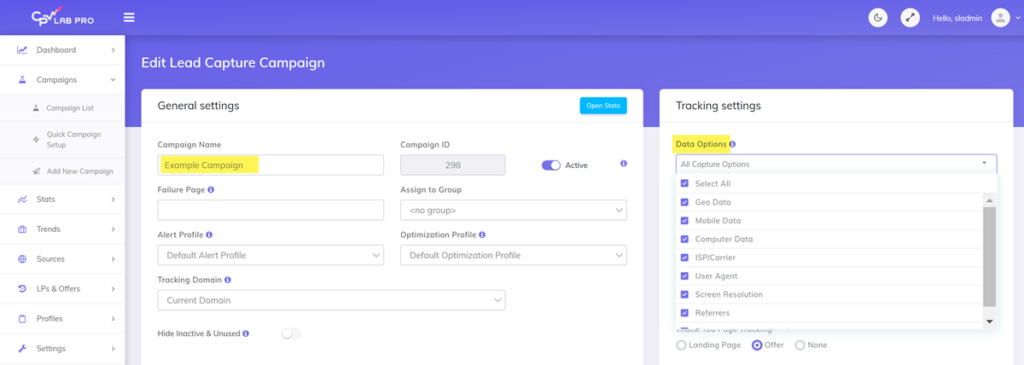
Add a name for your campaign in the “Campaign Name” field and select the data options that you like to capture.
You can capture information about GEO location, mobile data, ISP/Carrier and others. All the data points you need to optimize your campaigns.
Select the redirect type that you’d like to use. For this tutorial we’re going to use the “Double Meta Refresh (hide)” , but there other options available.
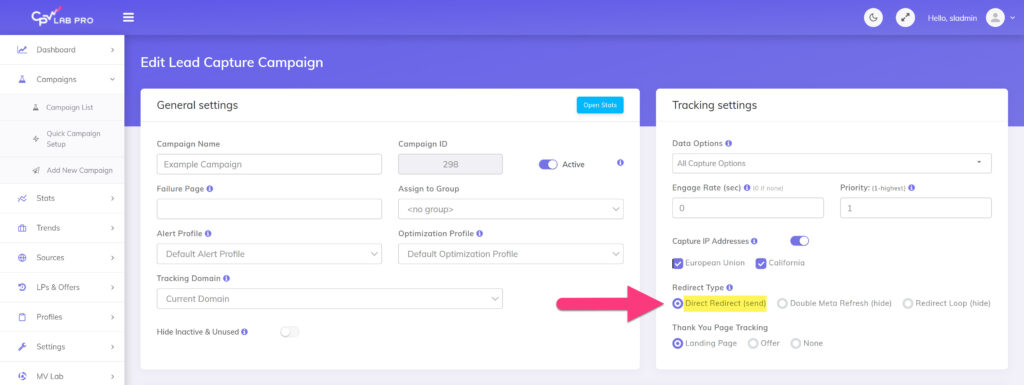
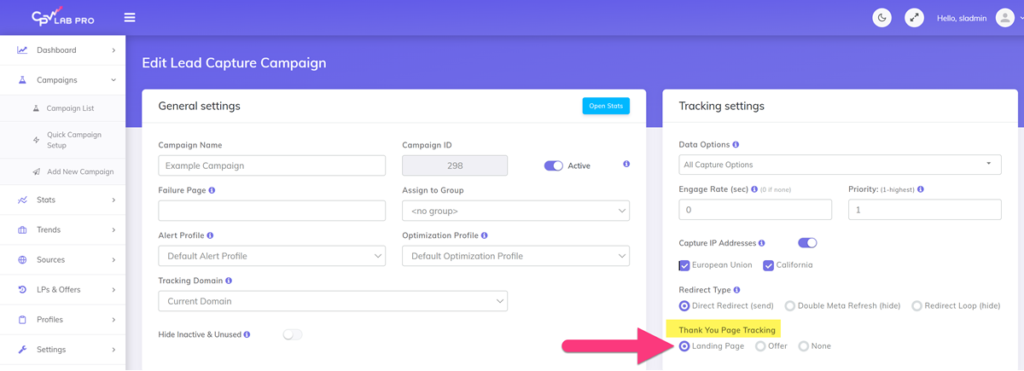
Now we’re going to select where the user goes after they opt-in. We can take them to a landing page or directly to the offer (or none).
In this tutorial we’re going to be taking the users to a thank you page so we’re going to select “Landing Page“.
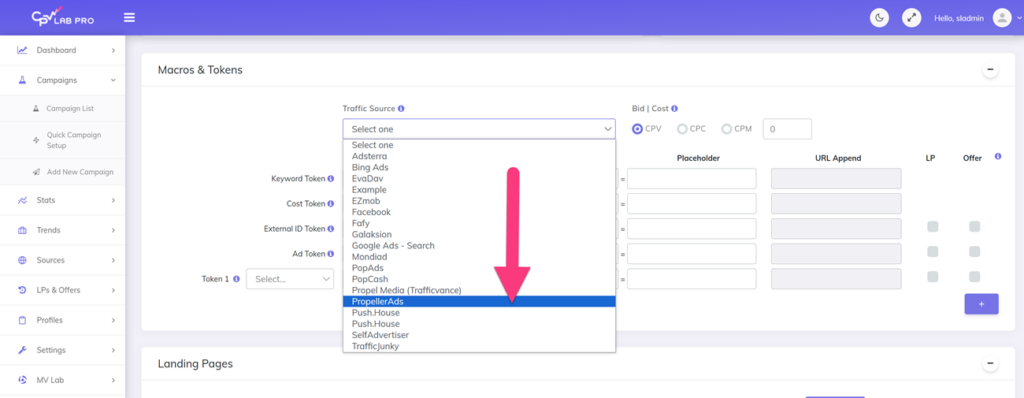
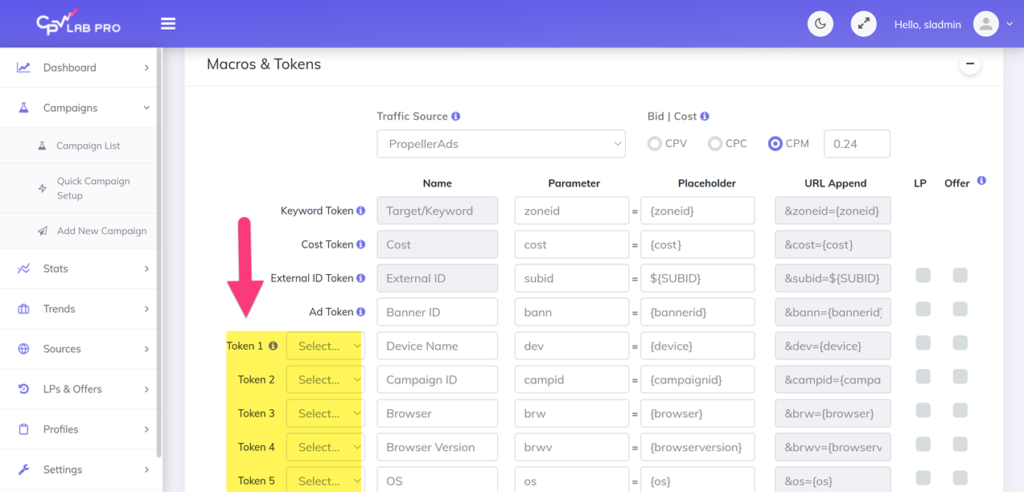
➁ Step 2: Add Macros & Tokens
Add a traffic source from the “Traffic Sources” drop down menu.
Then select a bid type and cost in the “Bid|Cost” area, and set the bid.
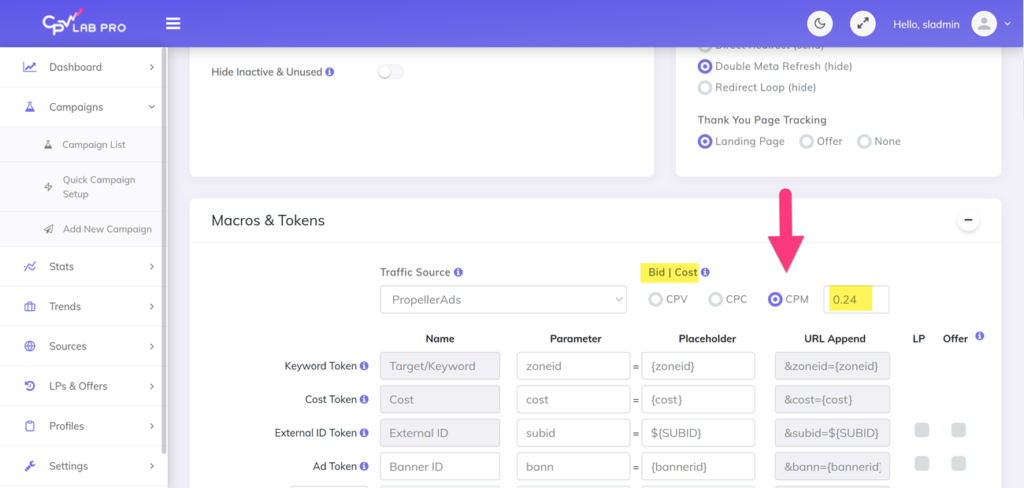
Add the tokens you’d like to use for your campaign.
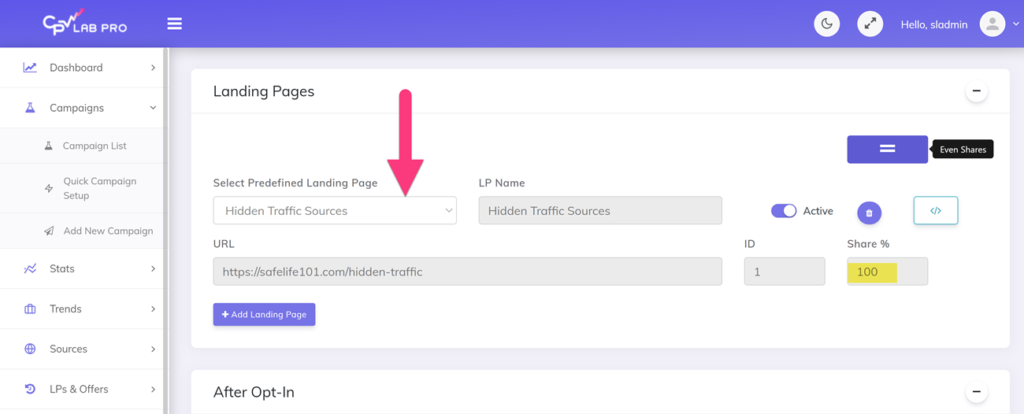
In the “Landing Pages” section select a landing page, then add the share percentage in the “Share %” field.
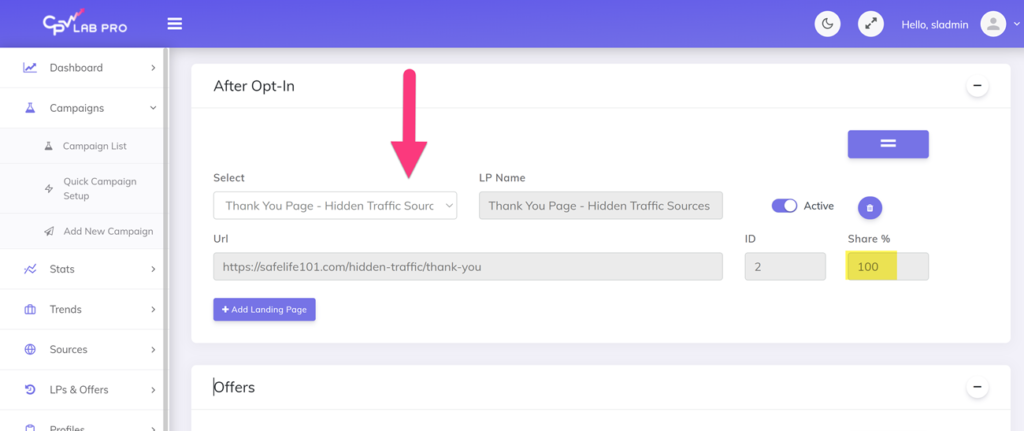
In the “After Opt-in” section select a landing that that the user will arrive on after they opt-in to you page.
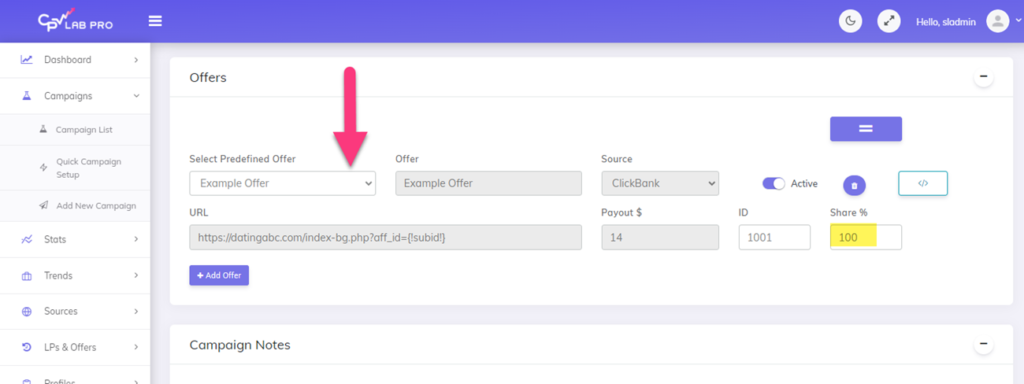
In the offers section click the “Select Predefined Offer” drop down menu and select the offer that you’d like to run.
➂ Step 3: Add Links and Pixels:
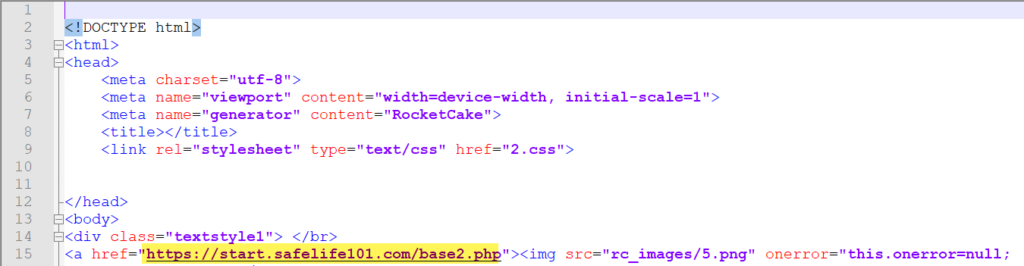
Add the link from the “Step 1: Add Landing Page Offer Links” section into the links, anchor, text, or buttons that you’d like to link too in your html file.
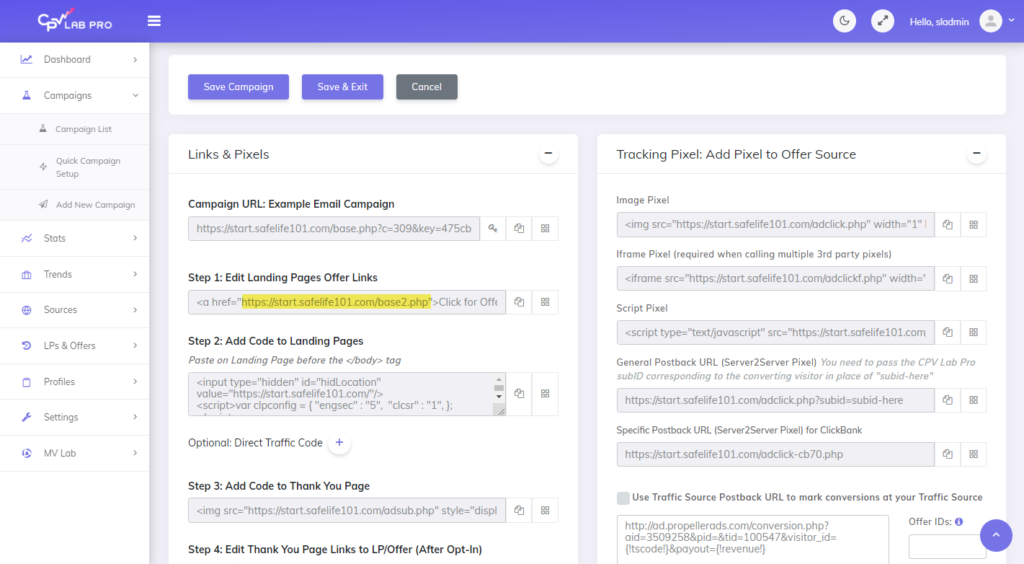
Example:
In the “Step 2: Add Code to Landing Pages” section copy the code.
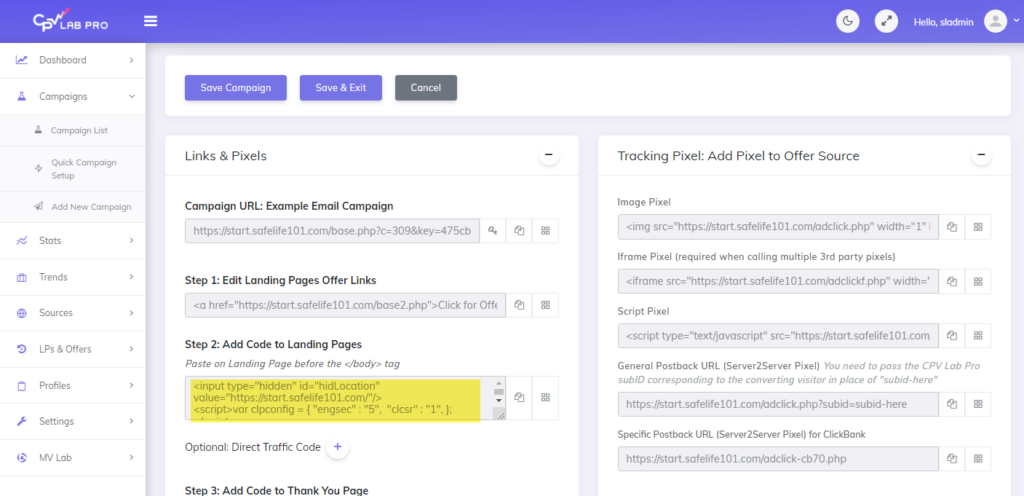
And then paste it into the html code above the closing body tag.

Now, we need to add the code from the “Step 3: Add Code To Thank You Page” to the html in our thank you page document.
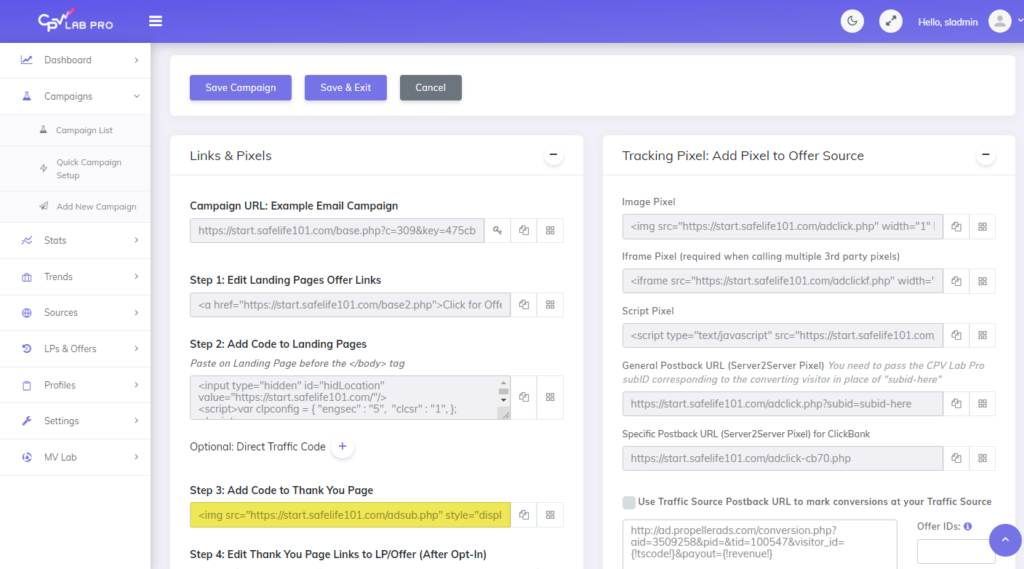
Like previously we need to make sure this code is placed above the closing body tag.
Additional Example:
<img src="https://example.com/adsub.php" style="display:none"/> </body>
**Light blue highlighting is where your thank you page pixel should be placed. The yellow highlighting is used to help identify the body tag of your page.
Opt-In Page Example:

Thank You Page Example:

Once your links and pixels are set your opt in campaign is ready to go!
Video Walk Through:https://www.youtube.com/watch?v=f-a7eudU22o

Guest Author: Patrick Hill
Patrick is an affiliate marketer with 8+ years marketing experience. He was certified at Meclabs Research Institute in 2019 for value proposition development and a Photoshop designer. He has experience working as a technical support manager at a CPA network, and loves to make graphic design and programming easy for average people.
Want to stay up-to-date on the fast-paced marketing industry? CPV Lab affiliate marketing tracker offers a complete toolkit for tracking and analyzing all your affiliate campaigns from one single place. And all starts with a Free 14 days Trial!
Cloud-hosted or Self-hosted ad tracker? your choice!