In digital marketing, optimizing and personalizing user experiences is paramount to achieving higher conversion rates and user engagement.
One of the pivotal tools that marketers, developers, and UX designers leverage to achieve this is multivariate testing software. MV Lab is a very powerful multivariate testing software that empowers users to test multiple page variations efficiently and effectively, streamlining the optimization process and ensuring that the deployed web pages are fine-tuned to meet user expectations and business objectives.
I personally use this multivariate testing software as the most powerful split testing tool that allows me to test multiple page variations without spending hours building each page version manually.
Instead of wasting hours or even days, you can have 20+ variations in less than 10 minutes with MV Lab. In this tutorial, I will walk you through the basics of getting you ready to take your affiliate marketing to a higher level and become more efficient than your competitors using this robust multivariate testing software.
MV Lab Beginners Tutorial:
| Table Of Contents | Location |
| Step 1: Download File | ⇾ Go To |
| Step 2: Extract Archive | ⇾ Go To |
| Step 3: MV Lab File Placement | ⇾ Go To |
| Step 4: Add Your Page | ⇾ Go To |
| Step 5: Add Multivariate Tokens | ⇾ Go To |
| Step 6: Add Variations | ⇾ Go To |
| Step 7: Add Multi Variate Code | ⇾ Go To |
| Step 8: Add Snippet Code | ⇾ Go To |
| Step 9: Test Campaign URL | ⇾ Go To |
| Video Tutorial | ⇾ Go To |
Step 1: Download MV Lab
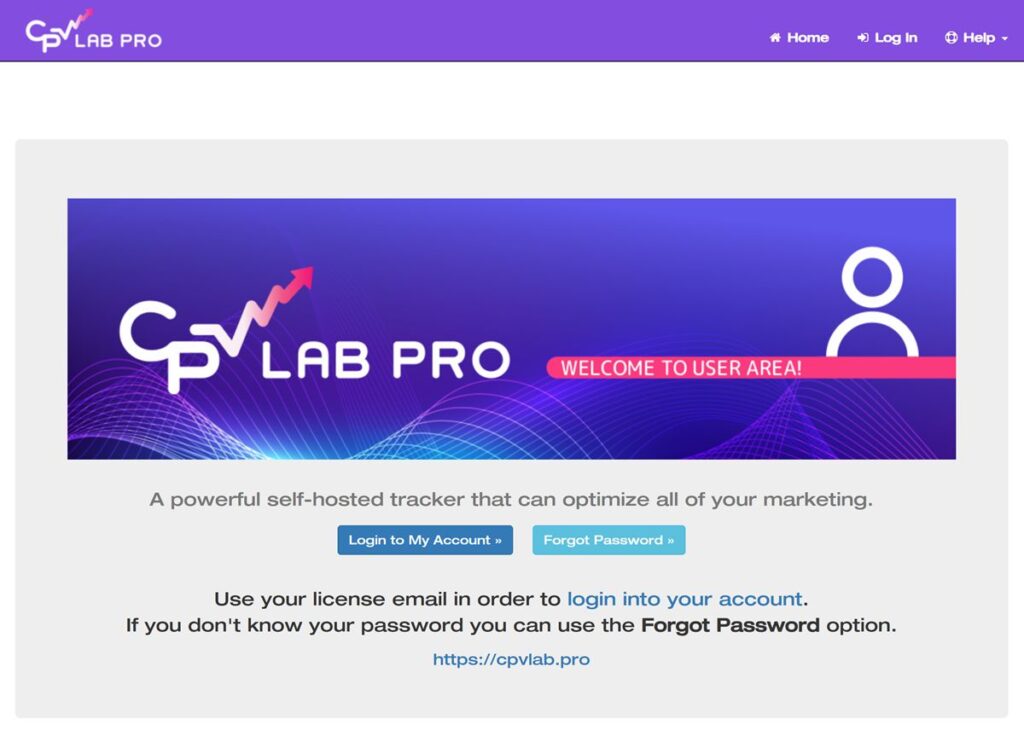
Log into the CPV Lab user account in the user account area.
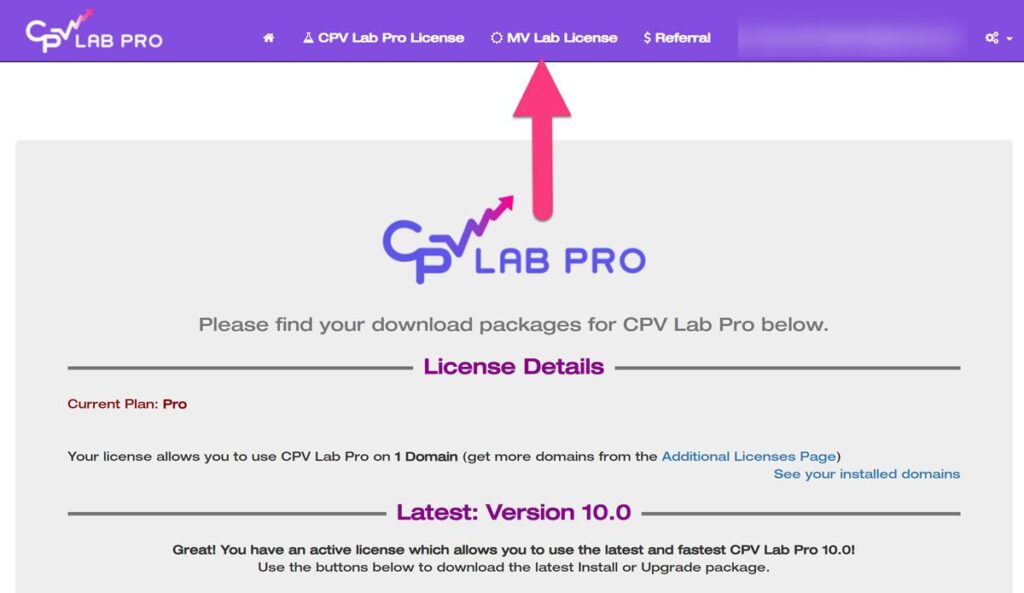
This is the section where you can find information about your CPV Lab license, MV Lab license and also about your referral link.
Then, click the “MV Lab license” link.
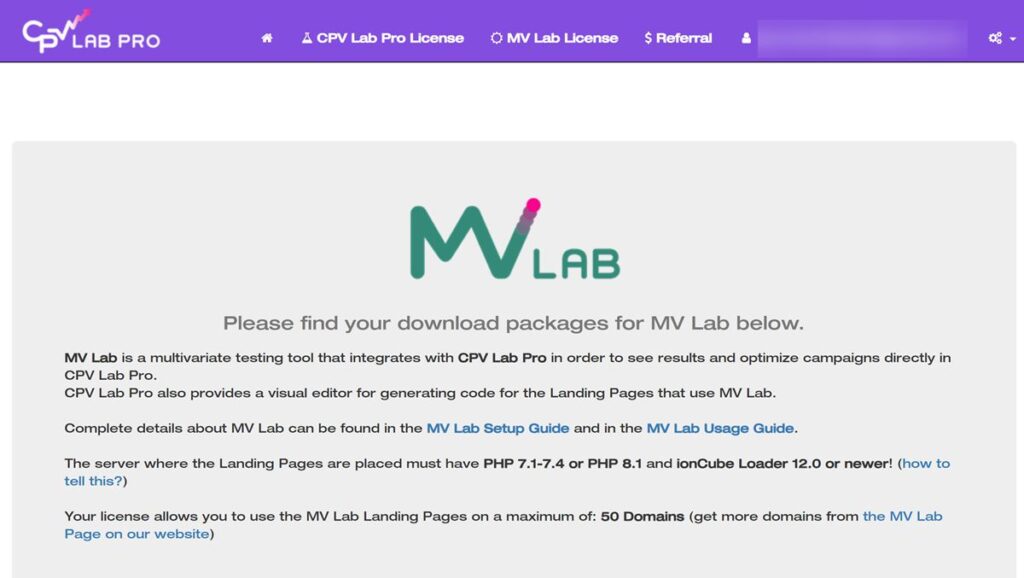
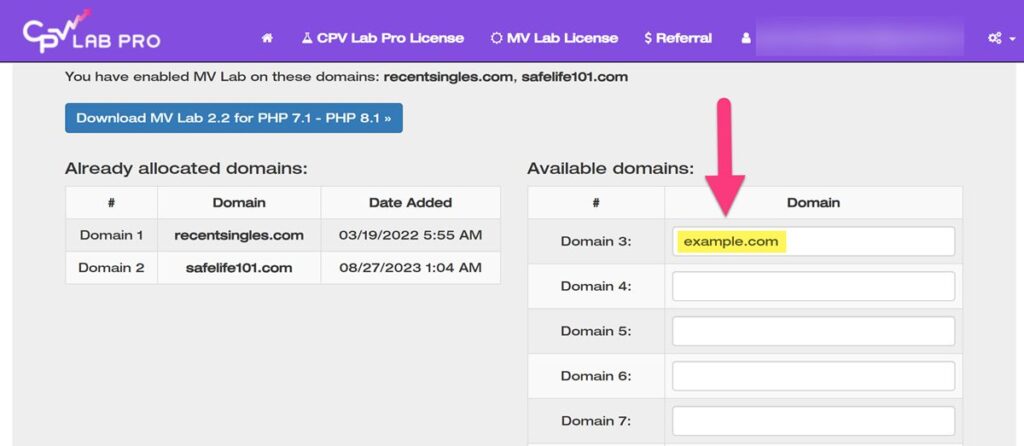
Scroll down until you see the “Available Domains” section.
Note: when you purchase a license for MV Lab you can pick to get it for 5, 10 or 50 domains. Depending on how many domains you use for your landing pages. Subdomains are also counted.
Now in the “Available domains” section we need to add a domain.
And click the “Generate New Download Package” button towards the bottom of the page.
This package will contain the code for your specific domains to allow multivariate testing on the pages from those domains.

Once the domain is added, click on the MV Lab download package that says “Download MV Lab…” and download the file.

Step 2: Extract File
After the MV Lab file (archive) is downloaded we can extract the file using free programs like WinZip, 7Zip, or WinRAR.

Extract the file using a zip file extractor.

Once the files are extracted we’re going to place the “mvlab.php” file into the same subfolder, or same directory (folder) that your page file is located.
Example: if your domain is “mysellingcars.com” and your landing page is “sellcar-example.php” and it is placed in the root of your domain, then the “mvlab.php” needs to be placed in the root as well.

Step 3: MV Lab File Placement
Now we need to make sure that the file extension for our landing page is saved as a php file. You can simply change the file extension from .html to .php.
Note: At the moment MV Lab works only with “.php. files.
Before:

After:

Step 4: Add Your Page
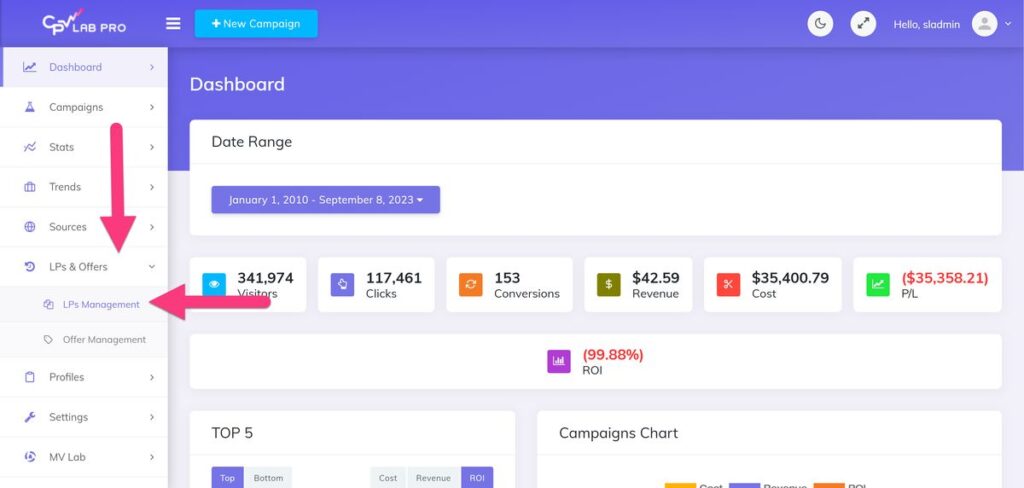
Go to the dashboard of your CPV Lab tracker, and click on the “LP Management” tab in the “LP & Offers” section.
Add a name for the landing page. Then, add the URL in the “URL” field of the page associated with the mvlab.php file, and save.

Step 5: Add Multivariate Tokens
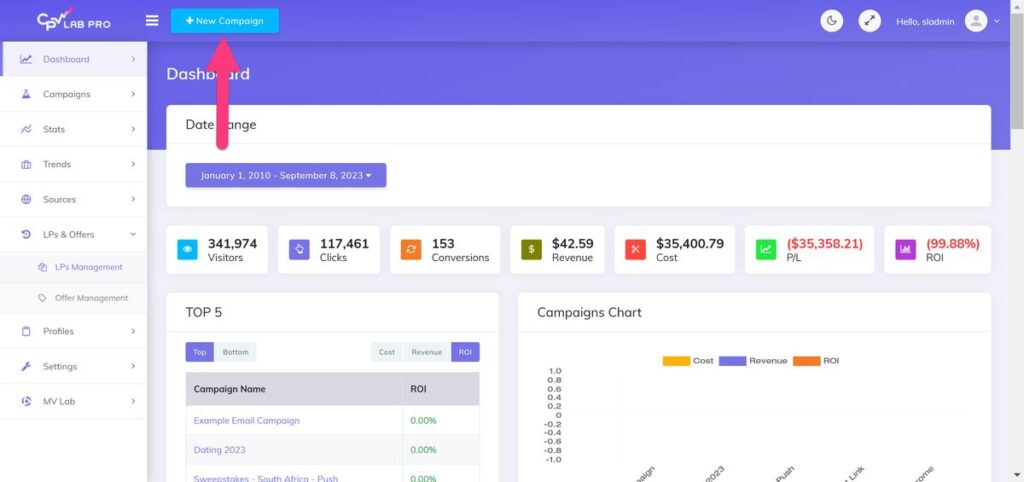
Create a new campaign, or use an existing campaign.
After you’ve added the tokens you’d like for your campaign add a “Multivariate” token for each variable you would like to test.
Add tokens in campaign for multivariate testing tracking.

**For example if we want to easily test (rotate) 3 variables like the headline, image and button color we need to add 3 multivariate tokens.
Make sure to save your campaign.
Step 6: Add Variations
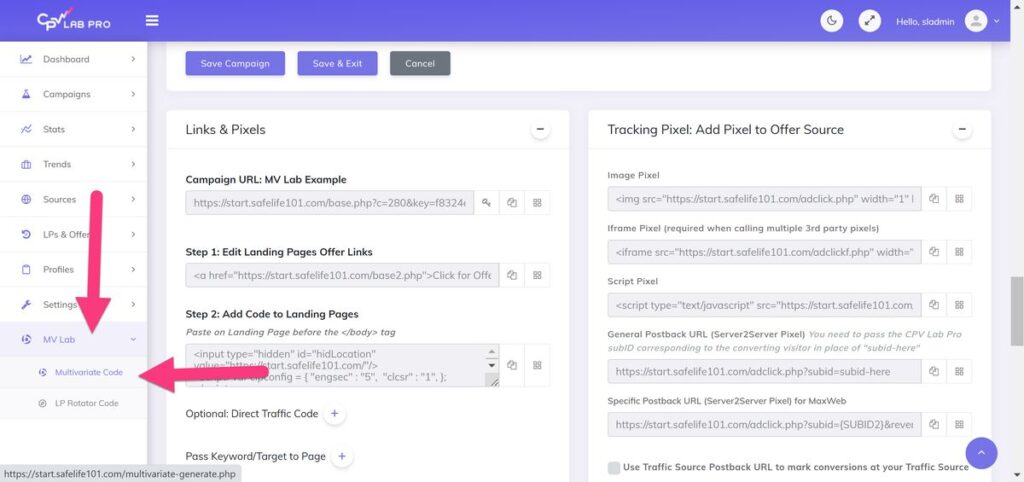
Now click on the “MV Lab” menu item, and click on “Multivariate Code“.
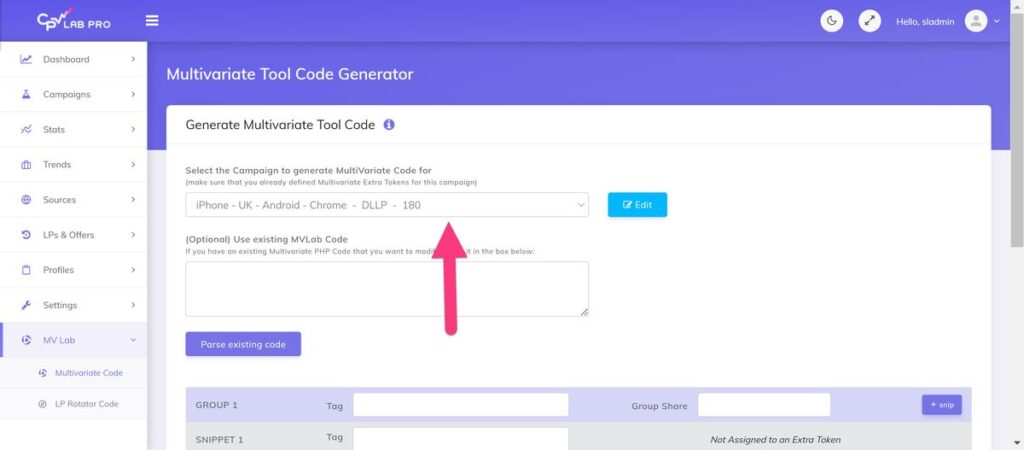
On the “Multivariate Tool Code Generator” page we need to make sure the campaign we’re going to be using is selected.
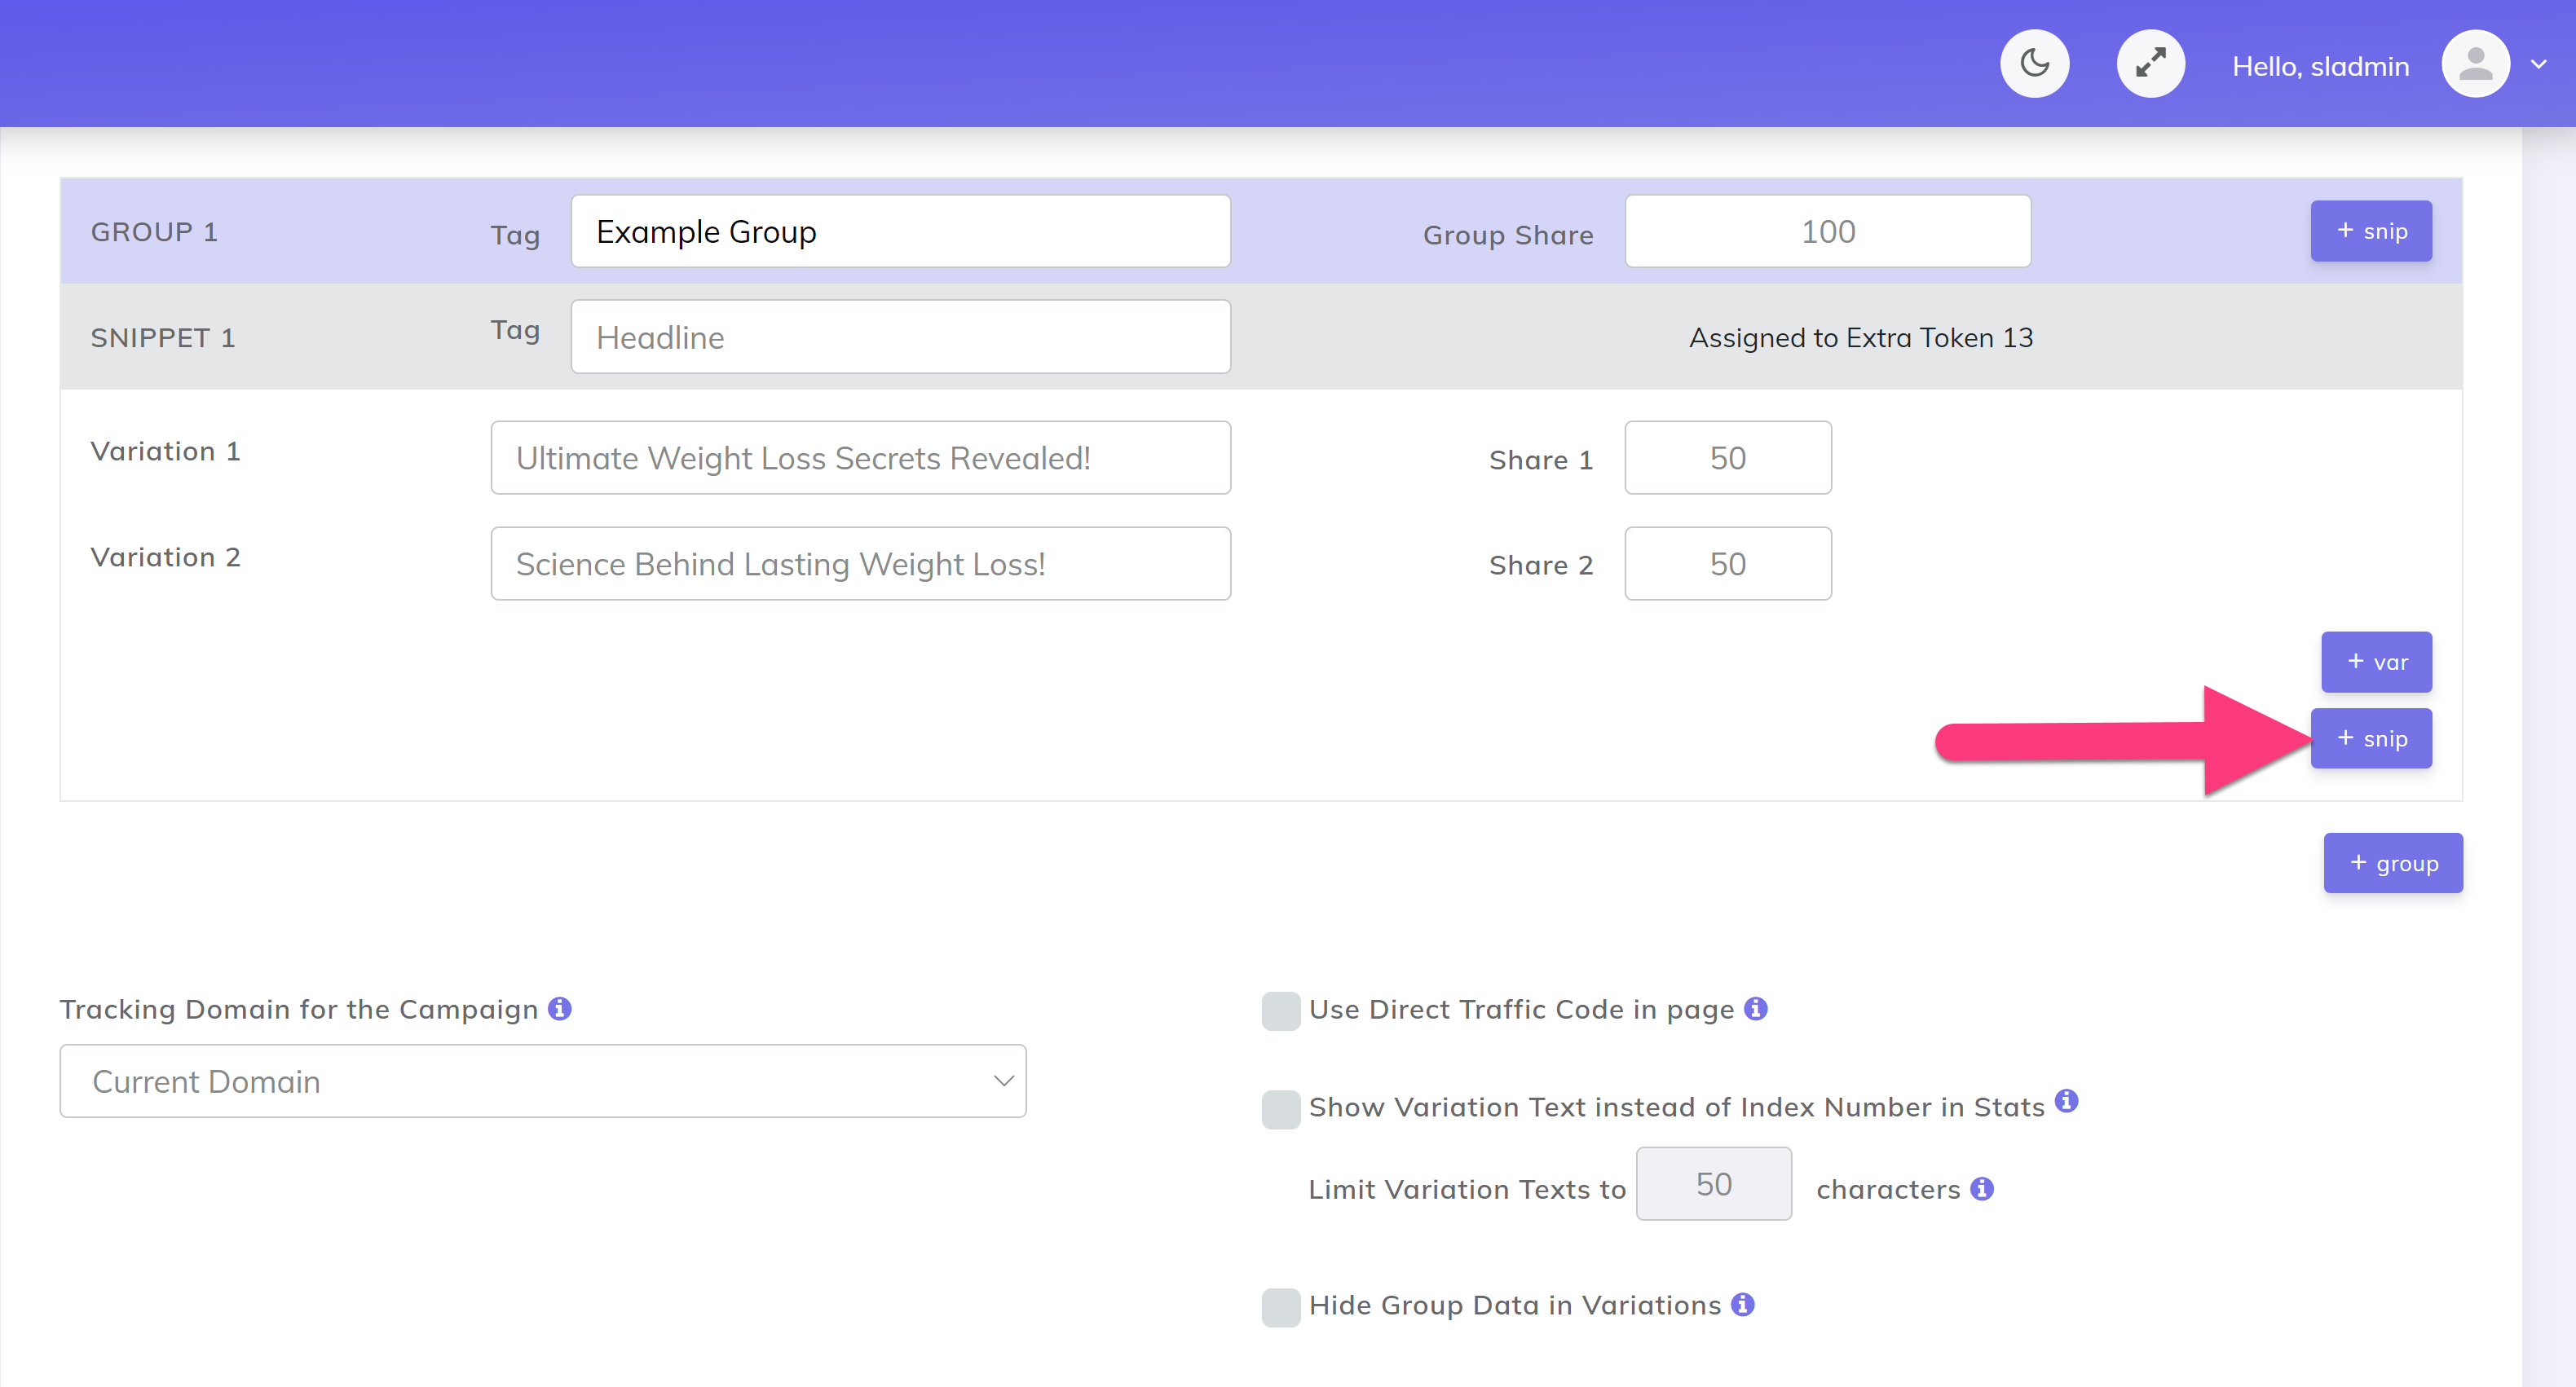
Now, we can add a tag name for our group, and set the “Group Share” percentage.
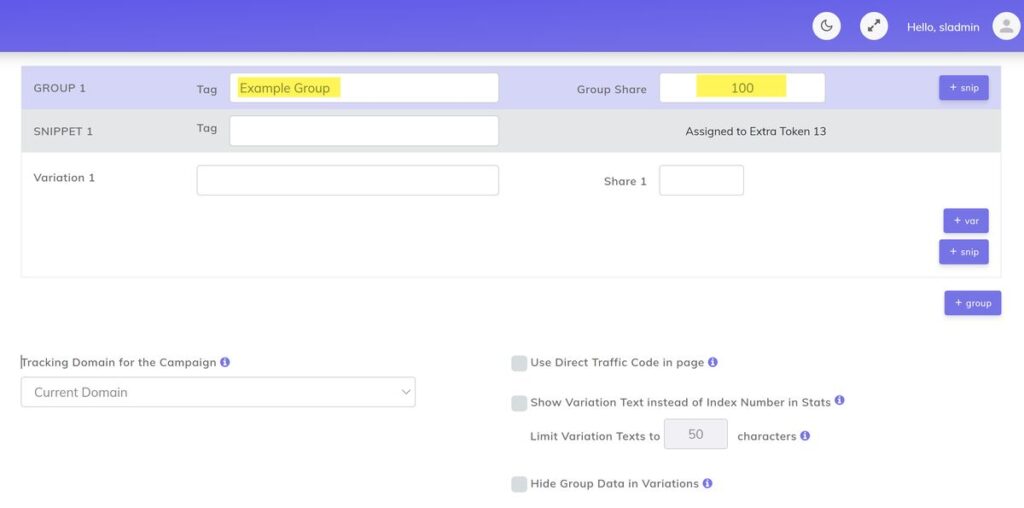
Add a name for your “SNIPPET 1” Tag. Then, add a headline in the “Variation 1” Box
Note: the Snippet tag is you “Multivariate token” from the campaign created on the previous step.
Variation 1:
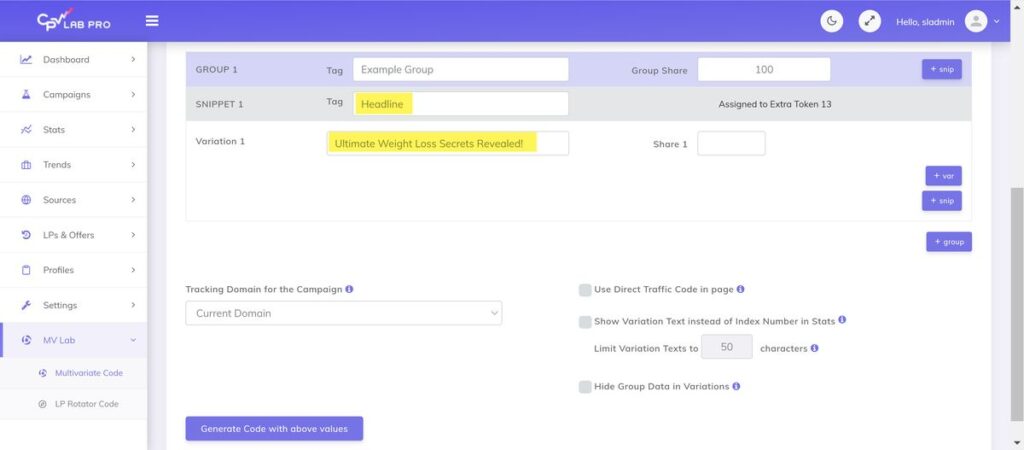
Important: Whatever is entered into the “variation” box(es) will show up exactly how it’s displayed in the box in the html. This allows you to easily place and split test emojis, scripts and other code as well.
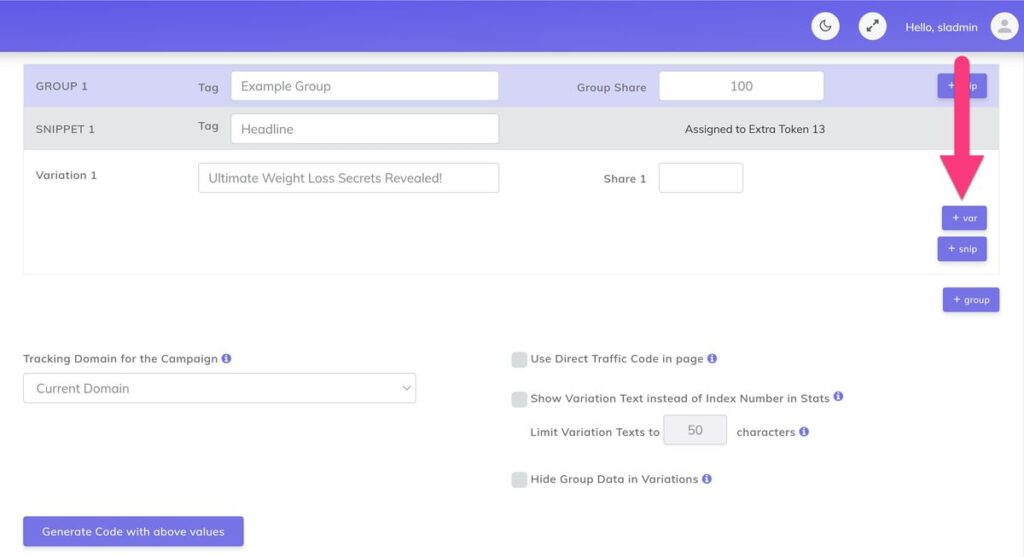
To add an additional variation press the purple “+var” button.
Now we can add a second headline in the “Variation 2” box.
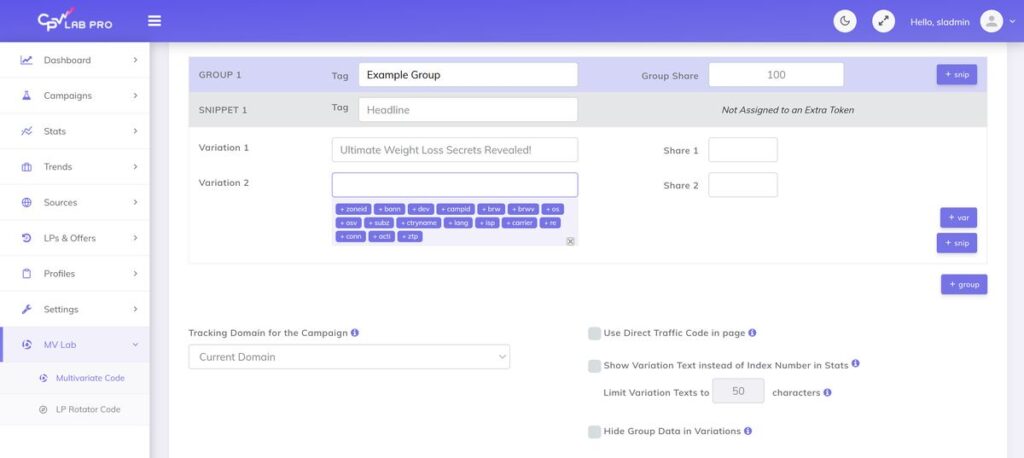
Variation 2:

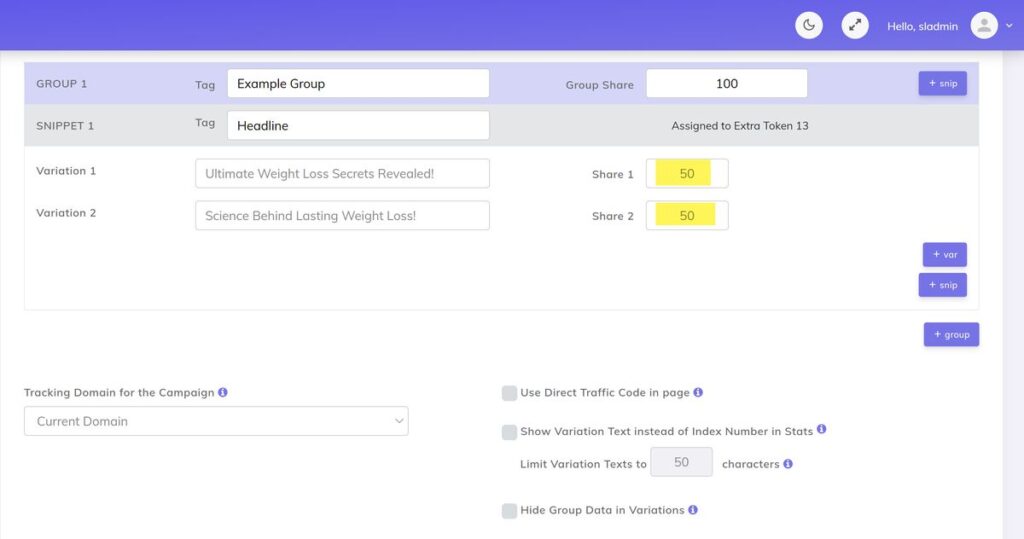
Set the share percentages in the “Share 1” and “Share 2” boxes. If you have additional variations you will also need to set the share percentage for them also
To add an additional variable we need to add another snippet. Press the “+snip” button to add an additional snippet.
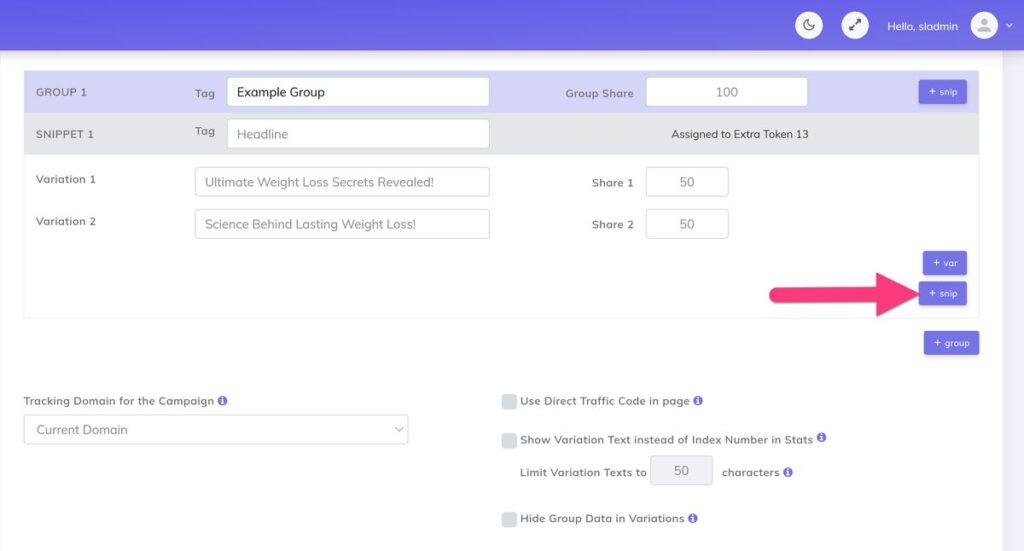
Split testing Fun Fact: Variables are items that change (vary). Values on the other hand are constants and do not change. Adding multiple MV Lab snippets could save you up to 74% more time than building each page variation individually.
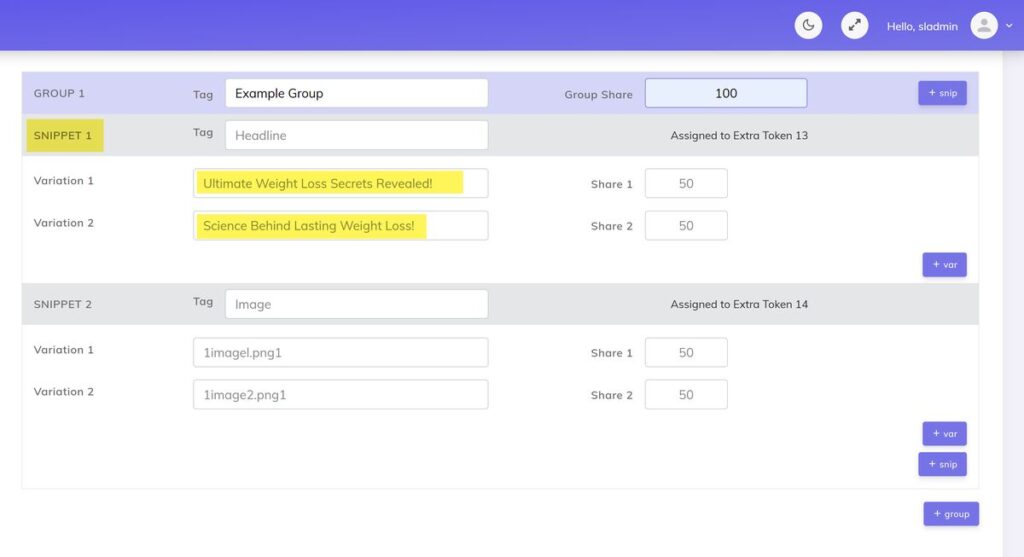
In the “Snippet 2” section we need to make sure we add the tag, variations, and share percentages like we did previously with the first snippet.

*You can add as many variations as you have available in the tokens section.
In this example we will use 3 snippets.
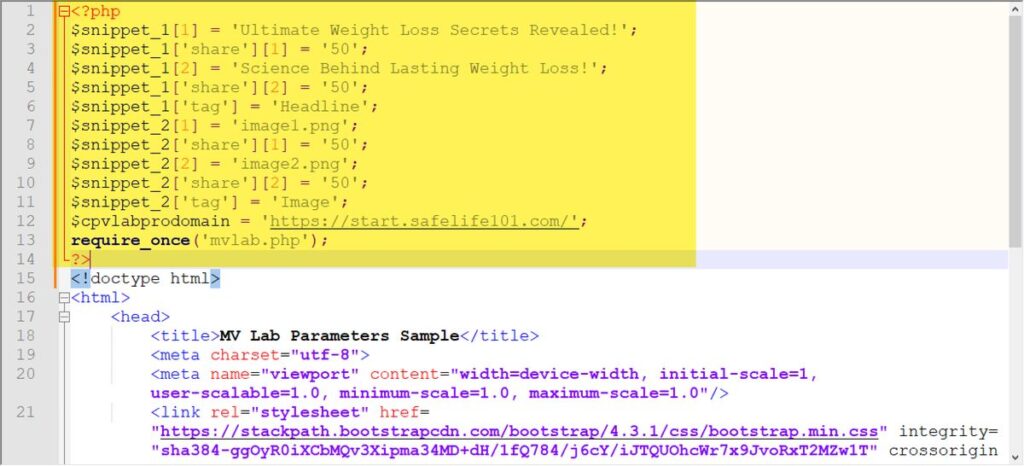
Step 7: Add Multivariate Code
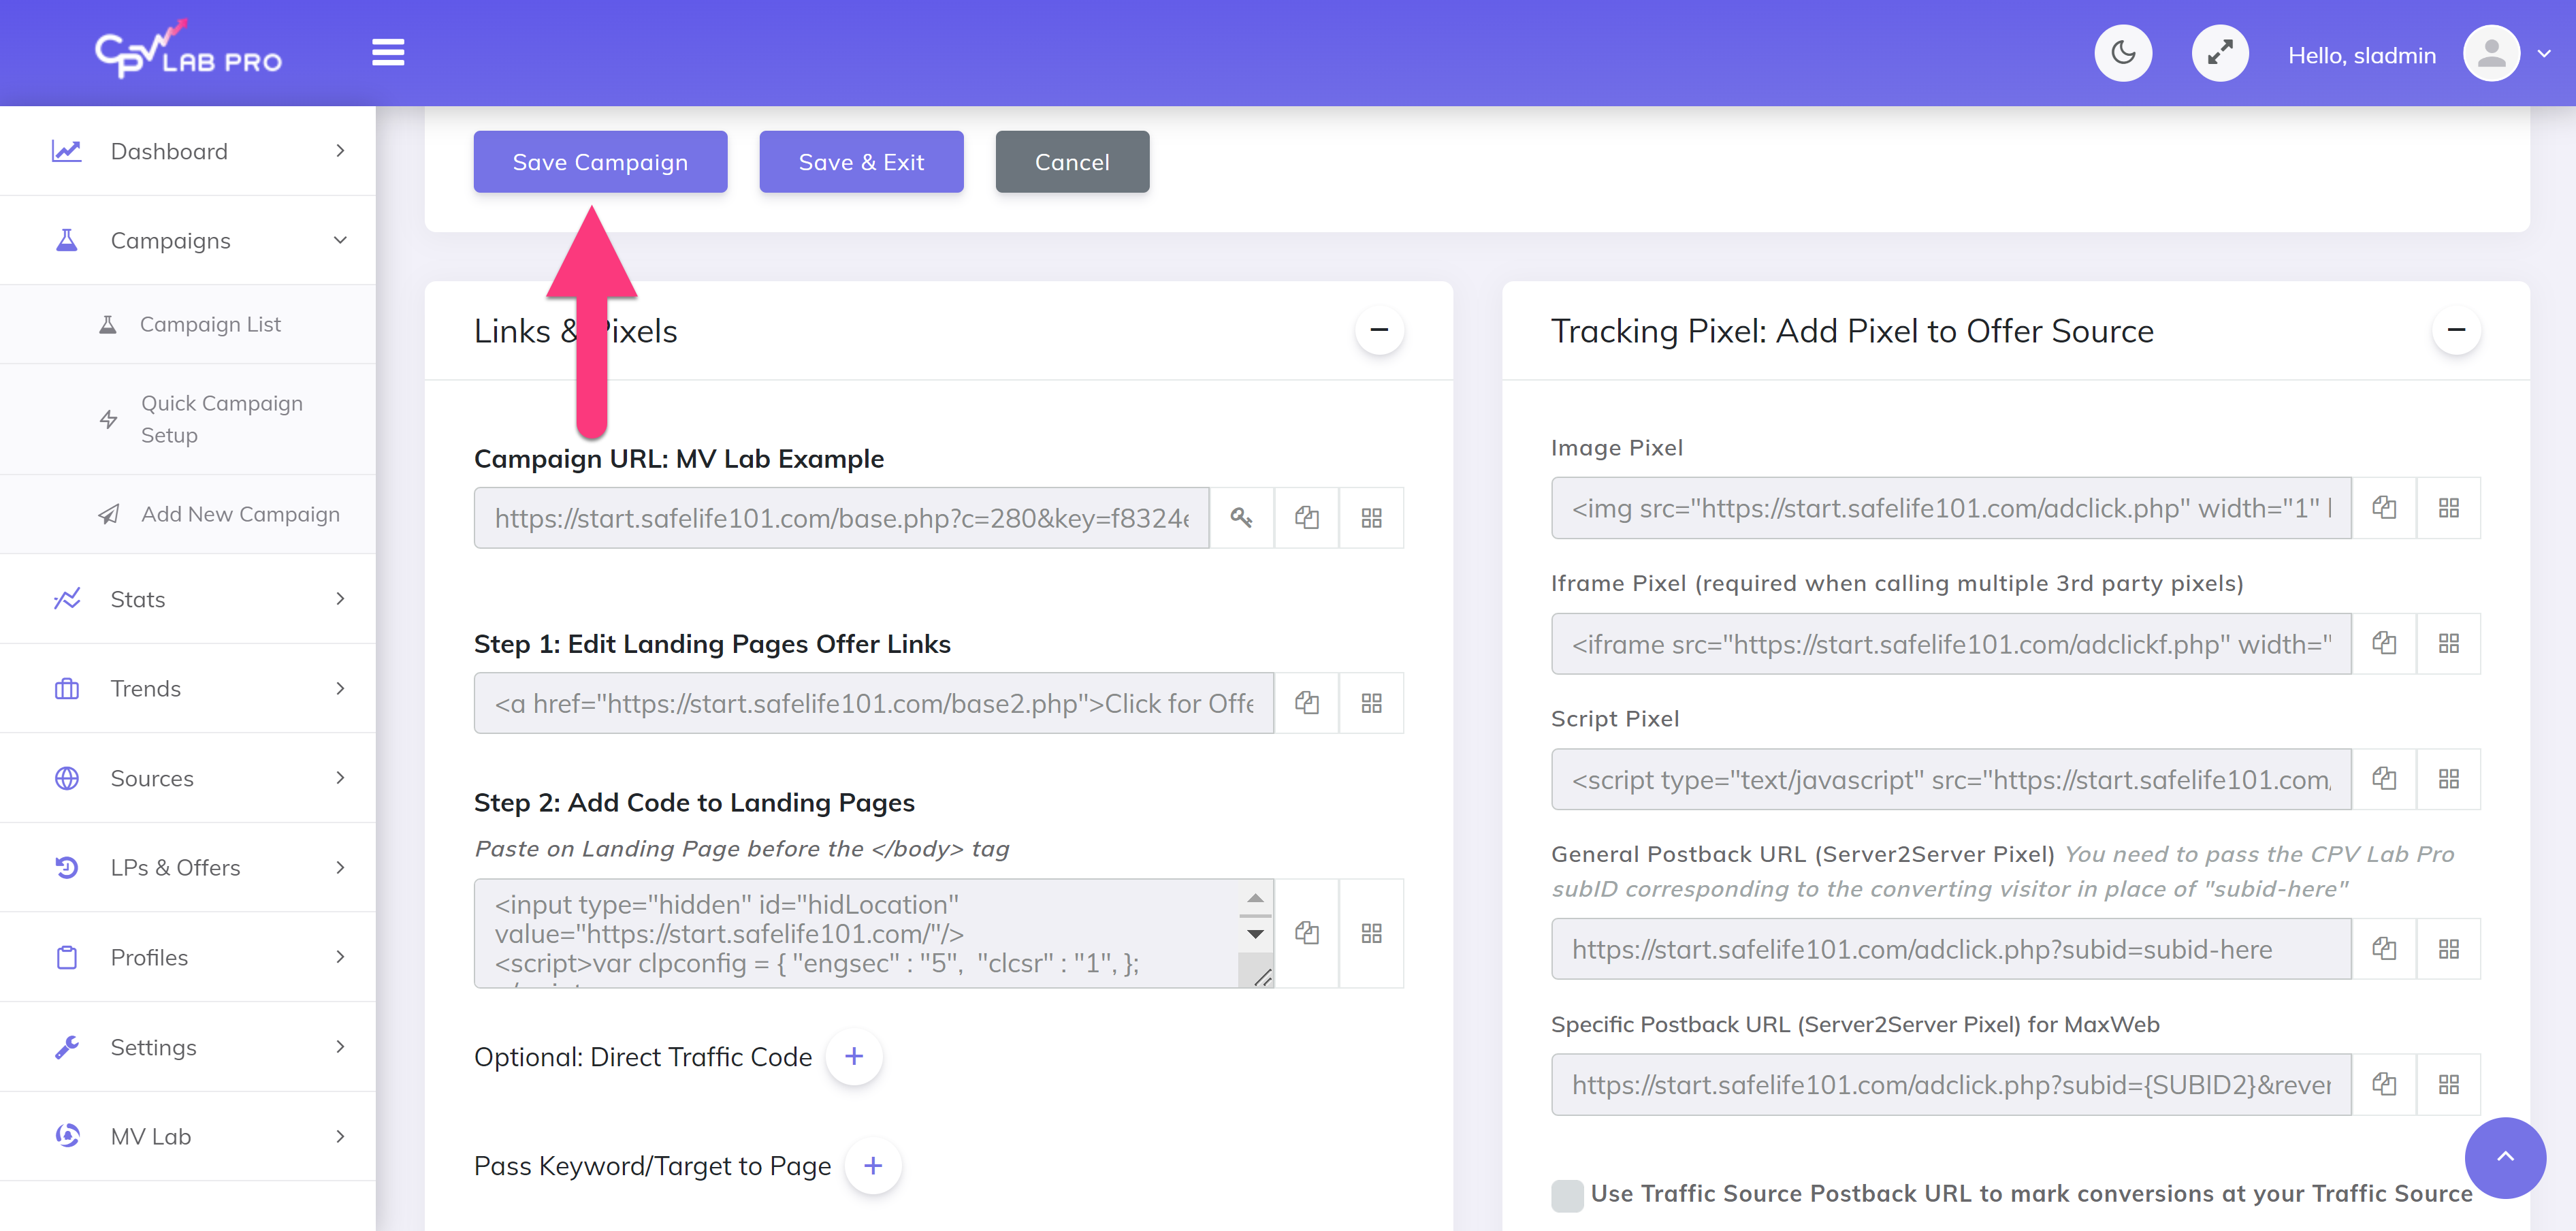
After you’ve finished adding the snippets and variations that you’d like to use; scroll down and click the “Generate Code with above values” button

Copy the code by clicking the copy icon.

Paste the multivariate code above the html in your php landing page, then save the file
Step 8: Add Snippet Code
Now we need to add a special short piece of code called the “Snippet code” into our html.
The default code will look like this:
Code: ##snippet_X##
We need to replace the “X” with the snippet number we’d like to use. This tells MV Lab to place the specific snippet variations that we created earlier into the html of our page.
Example:
Code: ##snippet_1##
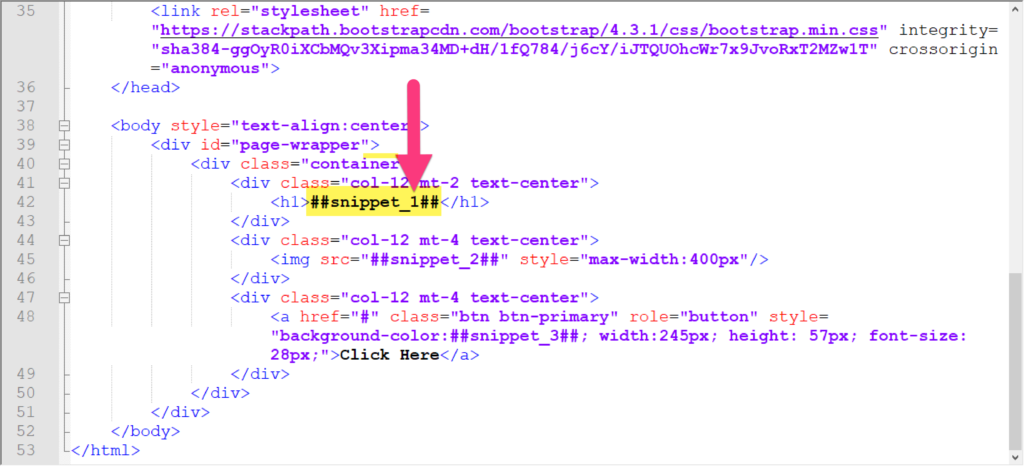
Now the “snippet 1” variations that were created earlier will be placed into the page’s HTML and displayed on our page.
We also need to add any additional snippets to the page by adding the snippet numbers to the code as before and placing them on the page also.
Example 2:
Code: ##snippet_2##
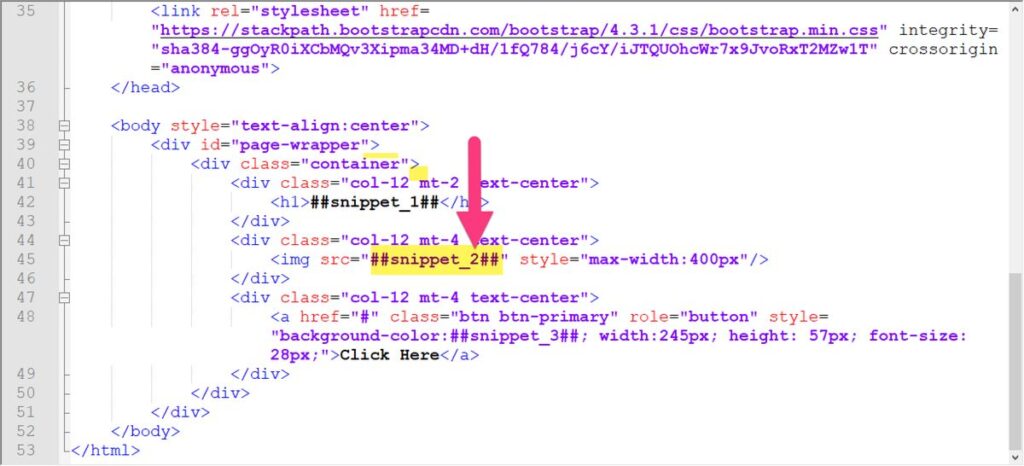
Note: Also make sure you save your php file.
Step 9: Test Campaign URL
Now just go to your campaign and copy the campaign url by clicking the copy icon.
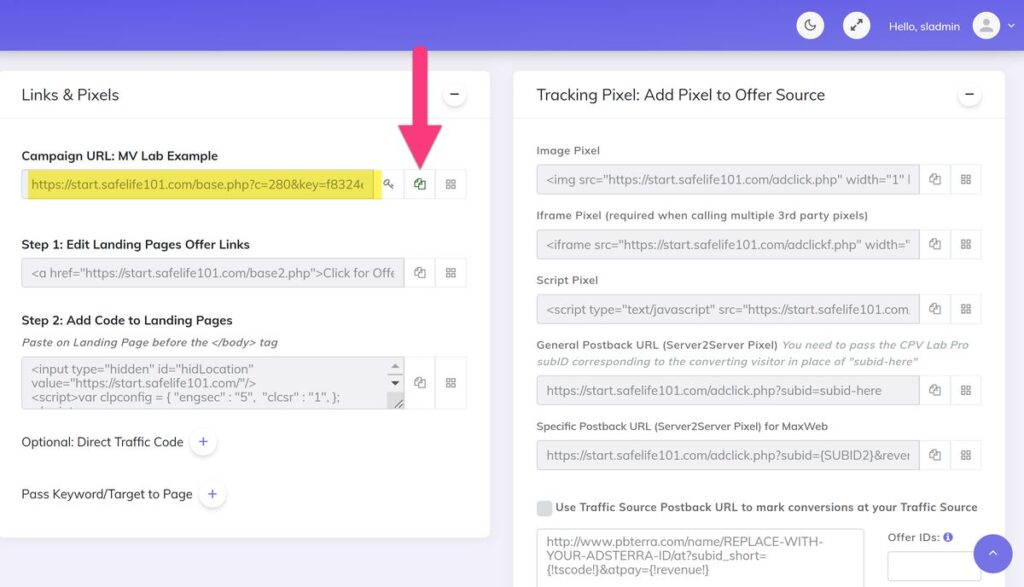
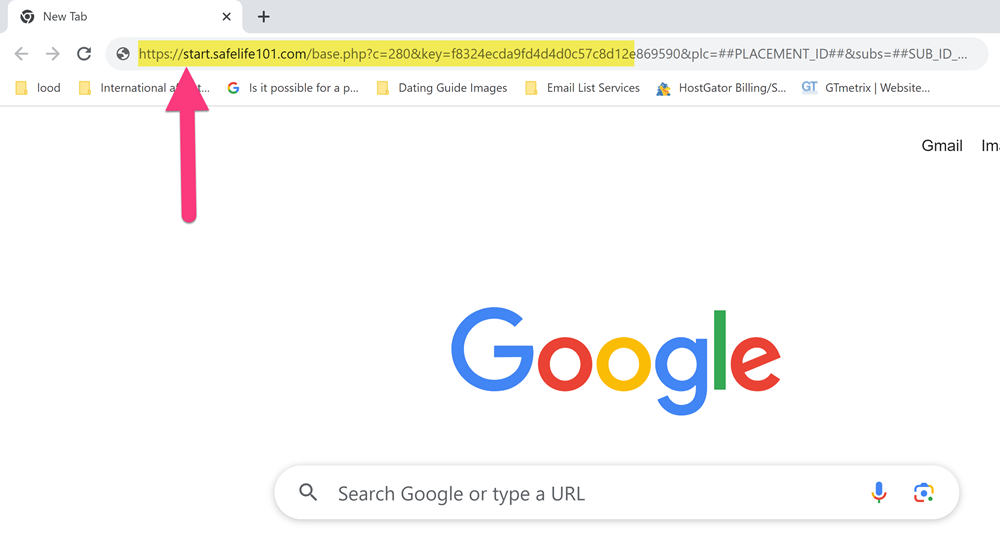
Then, paste and enter the link into the browser.
From one single page, you can test multiple variations and check the results in your Stats. Based on the results, you can identify which variation has a higher engagement rate, conversion rate, or click-through rate, all thanks to the comprehensive capabilities of MV Lab, your go-to Multivariate Testing software.
Variation Example 1:

Variation Example 2:

Conclusion
Navigating through the digital landscape requires tools that are not only robust but also user-friendly and efficient.
MV Lab, as a leading multivariate testing software, provides a seamless and efficient way to conduct multivariate tests, ensuring that your web pages are optimized to provide the best user experiences and achieve your digital marketing goals.
Whether you are an affiliate marketer, a UX designer, or a digital marketer, integrating MV Lab into your optimization strategy ensures you are always a step ahead in providing web pages that resonate with your audience and drive desired user actions.
Explore the multifaceted world of multivariate testing with MV Lab and embark on a journey toward enhanced user engagement and conversion optimization.
Contact CPV Lab Pro for more details and insights into maximizing your digital strategy with MV Lab, your reliable multivariate testing software.
Video Tutorial:

Guest Author: Patrick Hill
Patrick is an affiliate marketer with 8+ years marketing experience. He was certified at Meclabs Research Institute in 2019 for value proposition development and a Photoshop designer. He has experience working as a technical support manager at a CPA network, and loves to make graphic design and programming easy for average people.